Author: nick

  • How to Make Fluffy Donut Bread in Under an Hour

    How to Make Fluffy Donut Bread in Under an Hour

    As a chef who’s constantly craving that sweet spot between soft bread and a tender donut, this fluffy donut bread recipe has become one of my kitchen go to creations. It’s the perfect cross between a breakfast treat and an anytime snack light, tender, and ready in less than an hour. No deep frying. No dough rising. Just mix, bake, and enjoy the softest bites you’ll ever get from a donut pan.

    “It’s like a donut and a muffin had the softest, sweetest baby and it’s done in under 60 minutes.” – @QuickBakeQueen

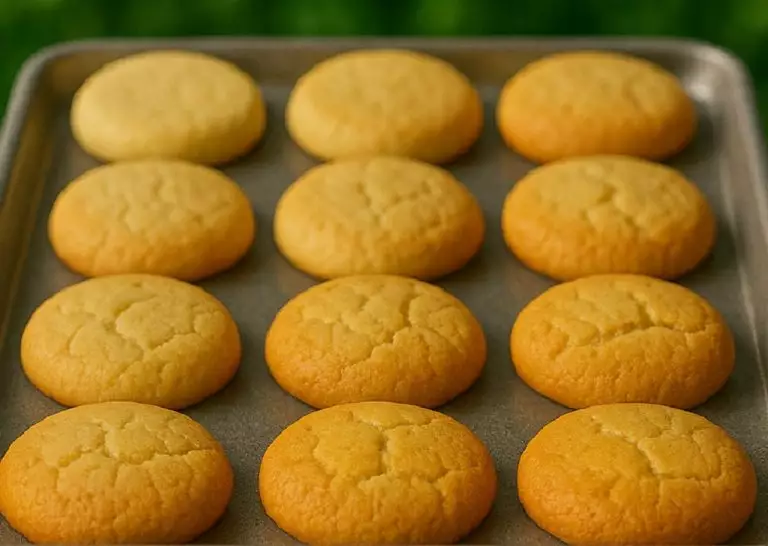
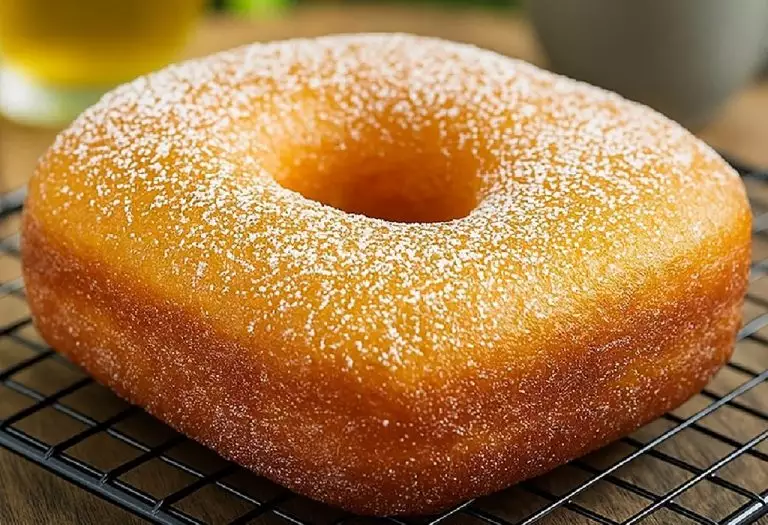
    Freshly baked fluffy donut breads dusted with powdered sugar on a cooling rack
    These soft donut breads are made in under an hour and dusted with sweet powdered sugar

    Why You’ll Love This Fluffy Donut Bread

    This recipe is everything a busy baker needs simple ingredients, fast baking, and bakery worthy results. Whether you’re making a morning treat or whipping up something for the kids, these donut breads rise beautifully in the oven and dust up perfectly with sugar.

    • Soft and fluffy texture: No yeast needed, just a gentle batter that bakes into light golden perfection.
    • Fast prep: From mixing to munching in under 45 minutes.
    • Minimal cleanup: Just two bowls and a spoon no mixer or fancy tools required.
    • Customizable flavor: Add spices, fillings, or glazes to switch it up every time.
    • Kid and crowd approved: Everyone loves a donut that’s secretly bread and vice versa.

    Step by Step Guide to Making Fluffy Donut Bread

    This donut bread doesn’t need yeast or long resting times and that’s what makes it so magical. Just mix, bake, and enjoy the aroma of fresh donuts wafting through your kitchen.

    Ingredients

    • 1 ½ cups all purpose flour
    • ½ cup sugar
    • 2 teaspoons baking powder
    • ½ teaspoon salt
    • ½ cup milk
    • ¼ cup vegetable oil
    • 1 egg
    • 1 teaspoon vanilla extract
    • Confectioners’ sugar for dusting

    Directions

    1: Preheat and Prep

    • Preheat your oven to 350°F (175°C).
    • Grease a donut pan with nonstick spray or a touch of oil. You can also use a mini muffin tin if you don’t have a donut mold.

    2: Mix the Dry Ingredients

    • In a large mixing bowl, whisk together the flour, sugar, baking powder, and salt until well combined.
    • This dry mix is your donut bread base keep it light by not compacting the flour as you measure.

    3: Whisk the Wet Ingredients

    • In a separate bowl, beat together the milk, oil, egg, and vanilla extract until smooth and slightly frothy.
    • Use a fork or whisk and don’t overmix we want a gentle blend.

    4: Combine Wet and Dry

    • Pour the wet mixture into the dry bowl and stir gently with a spatula or spoon until just combined.
    • Be careful not to overwork the batter a few small lumps are perfectly fine.

    5: Fill the Pan

    • Spoon or pipe the batter into the greased donut molds, filling each one about two thirds full.
    • Chef’s Tip: For neater results, use a piping bag or zip top bag with the corner snipped off.

    6: Bake

    • Bake for 10 to 12 minutes, or until the tops are golden and a toothpick inserted into a donut comes out clean.
    • Let cool in the pan for 2 to 3 minutes before carefully transferring to a wire rack.


    7: Finish and Serve

    • Once the donut breads are cool enough to handle, dust with confectioners’ sugar using a fine sieve or sifter.
    • Serve warm or at room temperature either way, they’re divine.
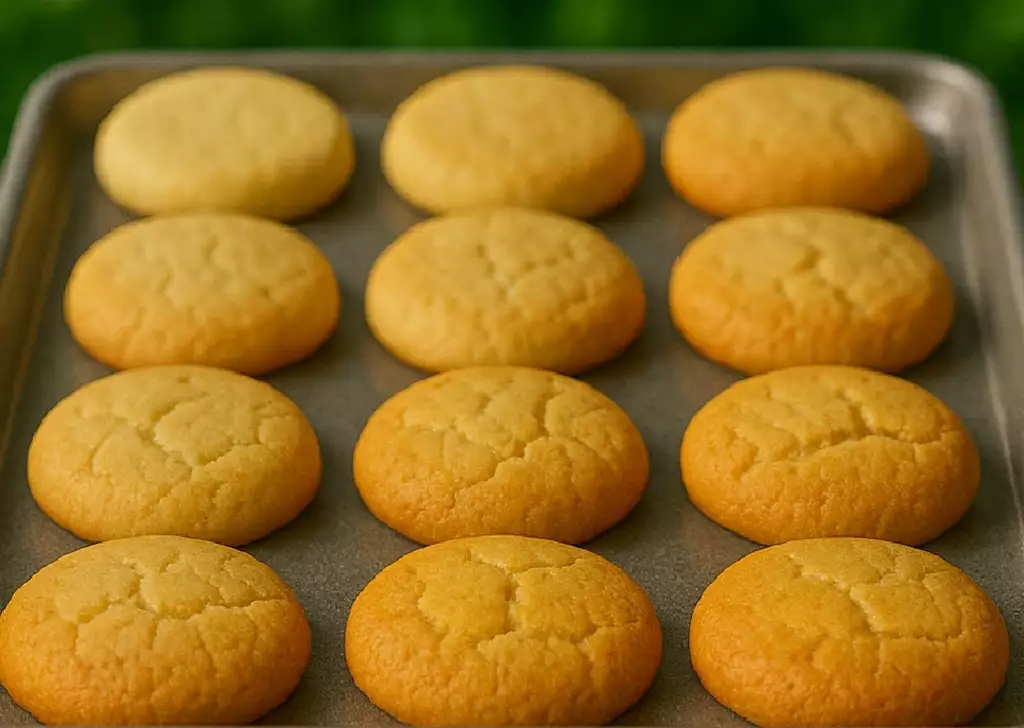
    Freshly baked fluffy donut breads dusted with powdered sugar on a cooling rack
    These soft donut breads are made in under an hour and dusted with sweet powdered sugar

    Flavors, Mix Ins, and Glazes to Try

    Easy Ways to Customize Your Donut Bread

    Once you’ve nailed the base recipe (and you will), it’s time to start experimenting. This fluffy donut bread is made to be personalized just like the best café style bakes.

    • Warm spices: Add ½ teaspoon cinnamon or nutmeg to the dry mix for a comforting twist.
    • Chocolate chips: Stir in ¼ cup of mini chocolate chips before baking for gooey centers.
    • Fruit add ins: Add chopped strawberries or blueberries and a touch of lemon zest.
    • Maple glaze: Mix ½ cup powdered sugar with 1 tablespoon maple syrup and 1 tsp milk.
    • Nutty topping: Sprinkle chopped pecans or almonds on top before baking for a crunchy bite.

    Pairings That Take It to the Next Level

    These soft donut breads are delicious on their own, but here’s how I love to serve them for maximum joy:

    Pairing Flavor Profile Why It Works
    Hot Coffee or Chai Bold, spiced, warming Balances the sweet, soft crumb with deep aromas
    Fruit Compote Tart, juicy, bright Adds contrast and moisture to each bite
    Whipped Cream Light, creamy, neutral Soft on soft pairs like a dream with fluffy bread texture
    Greek Yogurt and Honey Fresh, tangy, sweet A nutritious spin with balanced flavor and texture
    Peanut Butter Nutty, rich, satisfying Perfect for a high protein breakfast version

    How to Store and Reheat Donut Bread

    Keeping That Fluffy Texture Day After Day

    Donut bread is best enjoyed fresh out of the oven but if you have leftovers (which is rare in my house), here’s how to keep them soft, sweet, and just as delightful the next day.

    • Room Temperature: Store cooled donut breads in an airtight container at room temperature for up to 3 days. Line the bottom with a paper towel to absorb excess moisture.
    • Reheat: Warm them in the microwave for 8 to 10 seconds, or in a 300°F oven for 3 to 4 minutes to bring back the softness.
    • Freeze for Later: Freeze unfrosted donut breads in a zip top freezer bag for up to 2 months. Thaw at room temperature and reheat before serving.

    Fun Variations and Flavor Combos for Donut Bread Lovers

    Go Beyond Vanilla – Flavor Ideas That Wow

    Once you’ve mastered the basic fluffy donut bread recipe, the real fun begins flavor experimentation. This batter is a blank canvas, ready to absorb whatever twist your taste buds crave. Whether you’re baking for breakfast, a brunch treat, or dessert, try these variations to keep things interesting:

    • Chocolate Donut Bread: Replace ¼ cup of flour with cocoa powder. Add chocolate chips for an even richer texture.
    • Lemon Poppy Seed: Add 1 tablespoon of lemon zest and 1 tablespoon of poppy seeds to the batter. Glaze with lemon icing after baking.
    • Churro Style: Brush warm donut breads with melted butter and roll in cinnamon sugar instead of powdered sugar.
    • Pumpkin Spice: Add ¼ cup of canned pumpkin, ½ tsp of cinnamon, and a pinch of nutmeg to the batter.
    • Strawberry Shortcake: Top plain donut breads with whipped cream and sliced strawberries for a seasonal twist.

    Texture Tips for the Fluffiest Donut Bread

    Texture makes or breaks any donut style bake. We want the interior to be cloud soft and moist without being heavy or greasy. Here are my essential chef tips to make sure your donut bread stays fluffy every single time:

    • Do not overmix: Once you add the wet ingredients to the dry, stir gently until just combined. Overmixing activates the gluten, leading to tough texture.
    • Use fresh leavening: Check that your baking powder is fresh (under 6 months old). Old powder will lead to flat, dense results.
    • Fill the pan properly: Only fill each mold ⅔ full. Overfilling causes overflow and uneven baking.
    • Let them rest a few minutes: After baking, leave the donuts in the pan for 2-3 minutes. This helps them set and makes removal easier without sticking or breaking.
    • Cool completely before dusting: Powdered sugar melts into hot donuts wait until they’re just warm for that perfect, snowy finish.

    Need more fluff focused ideas? Try our fluffy yeast doughnuts or light cheesecake both showcase how airiness transforms any dessert.

    Sweet Toppings and Drizzles You Can Add

    These donut breads are delicious with just a sprinkle of powdered sugar, but when you want to take them to the next level, it’s all about toppings. From simple glazes to decadent drizzles, here are my favorite ways to finish them off:

    Topping Flavor Best For
    Vanilla Glaze Sweet, creamy, classic Perfect for kids, birthdays, or white icing drizzle art
    Chocolate Ganache Rich, deep, indulgent Special occasions or dessert trays
    Maple Syrup Glaze Warm, earthy, comforting Fall flavors or brunch spreads
    Berry Sauce Tart, fruity, fresh Spring and summer pairings, breakfast donuts
    Caramel Drizzle Buttery, sweet, golden Pair with nuts or banana slices for extra dimension

    Looking for an extra sweet treat to serve alongside? Pair your donut bread with a slice of pineapple paradise cake or some of our butter piped cookies for an afternoon tea that’s pure indulgence.

    Donut Bread for Every Occasion

    Don’t reserve this recipe just for lazy weekends. With a quick prep and easy bake, donut bread is ready to shine any day of the week and at just about any event. Here’s how I love to work it into different moments:

    • Weekday breakfast: Make a batch on Sunday and store for quick grab and go breakfast treats.
    • Brunch buffet: Include with muffins, fruit, and egg muffins for a full DIY spread.
    • School snacks: Pack in lunchboxes they hold shape and texture without needing refrigeration.
    • Dessert board: Combine with cookies, fruit, and soft breads for a unique donut bar setup.
    • Tea time: Serve with apple cake or a creamy dip like mascarpone and honey for a café style finish.

    Calories and Nutrition (Per Serving – 1 Donut Bread)

    • Calories: 160
    • Total Fat: 6g
    • Saturated Fat: 1g
    • Carbohydrates: 25g
    • Sugar: 10g
    • Protein: 3g
    • Fiber: 0.5g
    • Sodium: 140mg
  • Soft Condensed Milk Biscuits Recipe

    Soft Condensed Milk Biscuits Recipe

    When I’m deep into my baking zone and craving something sweet yet quick, I turn to a recipe that never fails. About eight ingredients in, I’m already thinking about condensed milk biscuits the kind that melt in your mouth and come together in under thirty minutes.

    These little treats have saved me during last minute brunch setups, unexpected guests, and even moody days where I just need to bake something comforting. As a chef, I’ve learned that recipes don’t need to be complex to be brilliant. This one is buttery, soft, and gently sweet with a creamy richness thanks to the magic of condensed milk. Moreover, they’re versatile enough for a tea party or a school snack box.

    Why You’ll Love These Condensed Milk Biscuits

    Simple, Flexible, and Comforting

    Let’s talk real life. I bake professionally, yes but I also bake with a toddler tugging at my apron or emails dinging in the background. These biscuits fit beautifully into that chaos. In fact, they embrace it. Here’s why they’re always on rotation in my kitchen:

    • Few ingredients: No eggs, no complicated steps just pantry basics and a can of condensed milk.
    • Creamy sweetness: The condensed milk adds a rich, velvety sweetness that’s not overpowering.
    • Quick bake: You’ll have warm biscuits in under 15 minutes from oven to plate.
    • Customizable: Add zest, a drizzle of chocolate, or sandwich two together with jam for a twist.
    • Kid and guest friendly: Everyone asks for more. Always. Especially with a cold glass of milk or warm cup of tea.

    How to Make Condensed Milk Biscuits Step by Step

    All You Need Is One Bowl and One Pan

    I love a low dish recipe, and this one practically begs you to skip the cleanup stress. Whether you’re baking with little ones or prepping in bulk for gifting, this dough is forgiving and fuss free.

    Ingredients You’ll Need:

    • 2 cups all purpose flour
    • 1 teaspoon baking powder
    • 1/4 teaspoon salt
    • 1/2 cup unsalted butter, softened
    • 1/3 cup sweetened condensed milk
    • 1 teaspoon vanilla extract
    • Optional: sugar for sprinkling

    Step By Step Guide for Condensed Milk Biscuits

    1: Preheat and Prep
    • Set your oven to 350°F (175°C).
    • Line your baking tray with parchment paper to prevent sticking.
    2: Mix the Dry Ingredients
    • In a bowl, whisk together flour, baking powder, and salt until well combined. This helps keep the biscuits uniform and fluffy.
    3: Cream Butter and Condensed Milk
    • In a large bowl, beat softened butter until creamy and airy.
    • Slowly add the sweetened condensed milk while continuing to beat. Blend until smooth.
    • Add the vanilla extract and beat briefly again.
    4: Combine Wet and Dry
    • Add the flour mixture to the butter mixture in batches.
    • Use a spatula or wooden spoon to stir gently. The dough should be soft and just slightly sticky.
    5: Shape and Arrange
    • Use a tablespoon or cookie scoop to form dough balls.
    • Place each ball 2 inches apart on the tray.
    • Sprinkle sugar on top if using.
    6: Bake
    • Bake in the preheated oven for 10-12 minutes.
    • The edges should turn golden, but the center stays pale and soft.


    7: Cool
    • Allow to cool on the tray for 5 minutes.
    • Then transfer to a wire rack to finish cooling.

    Need a visual? This technique is similar to how I form my butter piped cookies or doughnut like muffins it’s all about keeping the portions even and avoiding overmixing.

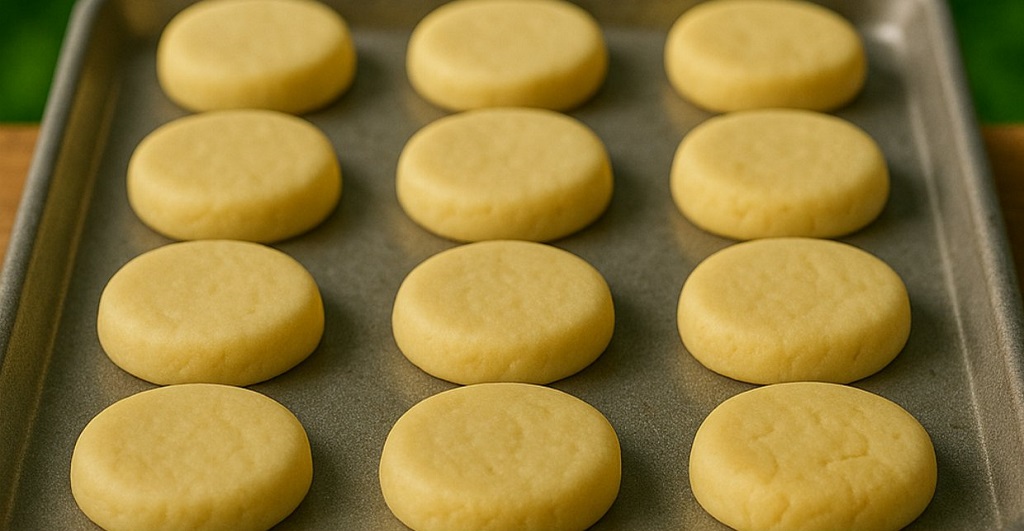
    A stack of golden condensed milk biscuits on a cooling rack with sugar on top
    Buttery condensed milk biscuits with a golden finish and melt in your mouth texture

    Chef’s Pro Tips for Condensed Milk Biscuits

    My Personal Tricks After Many Batches

    • Soft butter matters: Don’t skip this step. Cold butter won’t blend well and could cause uneven baking.
    • Don’t overmix: The dough should be stirred until just combined. Overmixing leads to dense, chewy biscuits instead of soft and crumbly ones.
    • Add citrus zest: Lemon or orange zest works wonders for brightness and a bakery fresh feel.
    • Customize shapes: Flatten with a fork for a rustic look, or use cookie cutters for fun shapes kids love.

    Want to go even fancier? Dip half of each biscuit in melted chocolate and let them set. It’s a simple upgrade that makes them look straight from a pâtisserie. You can also sandwich them with jam like I do on Sundays alongside sponge cake and cheesecake cupcakes.

    Creative Variations to Try

    Upgrade Your Condensed Milk Biscuits Anytime

    Once you’ve nailed the basic version and trust me, you will you’ll start imagining all sorts of add ins and tweaks. I’ve played with dozens of variations during café menu testing and even while prepping for food photography shoots. Each twist offers a new flavor vibe without losing the soft, melt in your mouth bite.

    • Chocolate Chip: Fold in 1/2 cup of mini chocolate chips before shaping the dough for that dreamy bakery flavor.
    • Coconut Delight: Add 1/3 cup of desiccated coconut to the mix for a subtle tropical richness.
    • Spiced Warmth: Stir in 1/2 tsp cinnamon and 1/4 tsp nutmeg for a cozy flavor that pairs beautifully with coffee.
    • Jam Thumbprint: Press your thumb gently into the center of each dough ball and spoon in a bit of strawberry or apricot jam.
    • Almond or Lemon Glaze: Mix powdered sugar with a teaspoon of almond or lemon extract and a touch of milk, then drizzle over cooled biscuits.

    I often test biscuit variations side by side on my baking days, especially when prepping for events. When arranged next to milk buns or banana bread, these standout biscuits always hold their own. In fact, the coconut and chocolate chip versions have become favorites at my Saturday market stall.

    Serving Ideas and Pairings

    How I Plate and Serve These Biscuits

    Every bite matters when it comes to presentation especially if you’re a chef who loves a strong visual punch. I’ve served these biscuits at pop ups, brunch tastings, and casual tea tables. They dress up easily but also feel right at home next to a cozy mug of milk.

    • With Afternoon Tea: Serve alongside warm crepes, crescent donuts, or egg muffins for a sweet salty balance.
    • On Dessert Boards: Slice in half and fill with cream cheese or Nutella, then surround with Nutella doughnuts and caramel cheesecake.
    • Milk Dippers: Pair with flavored milks like strawberry or almond for a nostalgic vibe. Great for kids and sweet toothed adults alike!
    • Giftable Treat: Wrap in parchment and tie with twine for DIY edible gifts. Perfect beside jars of vinegar cheese or homemade spice mixes.

    These biscuits hold their shape, don’t crumble easily, and stack like a dream. They’re a baker’s dream for styling and a customer’s favorite for texture. Plus, they complement so many other sweets that I often include them in mixed bake boxes during holidays.

    How to Store Condensed Milk Biscuits

    Keep That Fresh Baked Texture Intact

    I’ve learned over time (and many late night baking shifts) that storing biscuits well is just as important as baking them right. Here’s how I keep mine fresh for days without losing their soft interior or golden edges.

    • Room Temperature: Store in an airtight tin or container for up to 5 days. Use parchment between layers to avoid sticking.
    • Fridge: Not recommended unless the weather is very hot. If refrigerated, allow to come to room temp before eating.
    • Freezer: Absolutely yes! Freeze dough balls on a tray until solid, then transfer to a zip top bag. Bake directly from frozen, adding 2 minutes to baking time.
    • Reheating: If you want to warm them up, a quick 5 second zap in the microwave does wonders, especially with a drizzle of honey or glaze.

    Planning for brunch? I bake a double batch, freeze half of the shaped dough, and just pop them into the oven on the day of the event. Pair freshly baked biscuits with yoghurt cake or condensed milk cake for a texture rich, flavor balanced table.

    Nutrition Info Per Biscuit

    Know What You’re Eating

    Nutrient Amount (Per Biscuit)
    Calories 120
    Total Fat 6g
    Saturated Fat 3.5g
    Carbohydrates 15g
    Sugar 5g
    Protein 2g
    Sodium 85mg

    This nutrition profile makes it a nice middle ground not too rich, not too airy. It sits somewhere between a cookie and a soft biscuit, which is exactly why it’s become such a hit in both cafés and home kitchens.

    Common Mistakes When Baking Condensed Milk Biscuits

    Learn from My Trials in the Kitchen

    Every baker hits a few bumps while testing recipes, and condensed milk biscuits are no exception. I’ve made these more than fifty times across my workshops and baking events, and here are the slip ups you’ll want to steer clear of because yes, I’ve made them all myself!

    • Using cold butter: Your butter should be soft, not cold or melted. If it’s too cold, the dough won’t cream properly. If it’s melted, the biscuits will spread too thin.
    • Overmixing the dough: Once the dry ingredients hit the bowl, stir just enough to bring it all together. Overmixing will activate the gluten, creating dense biscuits.
    • Adding too much flour: It’s tempting to fix sticky dough with extra flour, but resist. The stickiness helps keep these biscuits soft. Use lightly floured hands instead.
    • Skipping the parchment: These biscuits contain sugar, which can caramelize on metal pans and lead to sticking or over browned bottoms. Always line your tray.

    Every time I host a bake along, I remind students of these mistakes. The texture of these biscuits is very forgiving, but only if you don’t overwork or overtweak the dough. As a safety net, I always test one biscuit first before baking a full tray adjusting temperature or time as needed depending on the oven.

    Condensed Milk vs. Sugar in Baking

    What Makes It So Special?

    As a chef, I’m always explaining to clients and students why condensed milk works differently than granulated sugar in doughs. When you use sweetened condensed milk, you’re not just adding sweetness you’re also contributing to the liquid, fat, and even protein content of your bake.

    Ingredient Main Contribution Effect on Texture
    Condensed Milk Sweetness + Liquid + Fat Moist, rich, soft inside
    Granulated Sugar Sugar only Crumbly, crisp exterior
    Butter Fat only Flaky or tender structure
    Milk Moisture only Can lead to dry bakes if overused

    This is why condensed milk biscuits don’t need additional milk or sugar. It’s an all in one powerhouse. You’ll notice the crumb is tighter, yet soft. The golden color is deeper. The taste? More balanced. I love using condensed milk in both biscuits and breads like our homemade milk bread and condensed milk cake.

    Texture Tips from a Professional Chef

    The Secret Behind That Melt in Your Mouth Bite

    People always ask what makes my version of condensed milk biscuits so buttery and soft. I’ve worked in commercial kitchens where we batch 600+ at a time, and I’ve also baked these at home on stormy days with nothing but a bowl and spoon. Across the board, here’s what I’ve learned:

    • Don’t chill the dough: Unless it’s very hot in your kitchen, room temp dough helps keep the biscuits pillowy.
    • Use a cookie scoop: Even sizes mean even baking. This avoids one biscuit being raw while another overbakes.
    • Sprinkle sugar after shaping: This gives a delicate crunch on top without interfering with the texture inside.
    • Always rest the tray: Let your dough balls sit on the tray for 5 minutes before baking. This relaxes the gluten slightly and enhances lift.

    I compare this biscuit texture to a soft shortbread met with a sugar cookie just less crumbly. When you bite in, there’s no dry mouth feel. That creamy sweetness from the condensed milk lingers just enough. For a similar mouthfeel in a completely different format, check out our butter piped cookies.

    Best Condiments and Add Ons

    What Pairs Well with Condensed Milk Biscuits?

    These biscuits are wonderful on their own, but if you really want to dress them up for a party platter, brunch board, or tea tray, I recommend offering small batch condiments alongside. Here’s my go to flavor board when I serve them at tastings or styled shoots:

    • Fruit Jams: Strawberry preserves or lemon curd work beautifully.
    • Nut Butters: Almond butter or even peanut butter cream for a nutty depth.
    • Flavored Cream Cheese: Cinnamon swirl or vanilla bean add a rich contrast.
    • Fresh Whipped Cream: Light, airy, and not too sweet perfect for balance.

    I once served these biscuits with a trio of whipped toppings: lemon zest cream, espresso butter, and maple cinnamon whip. It was an instant hit. If you want to keep it simple, just offer them with a warm mug of milk or beside a slice of Japanese cheesecake for a light but indulgent dessert board.

  • Easy Homemade Cinnamon Rolls Recipe

    Easy Homemade Cinnamon Rolls Recipe

    Creating the perfect cinnamon roll is akin to conducting a symphony; every ingredient must come together harmoniously to produce a masterpiece of flavor and texture. As a chef, I take pride in refining these traditional treats, ensuring they emerge from the oven with just the right balance of soft, fluffy dough encasing a rich, cinnamon infused filling.

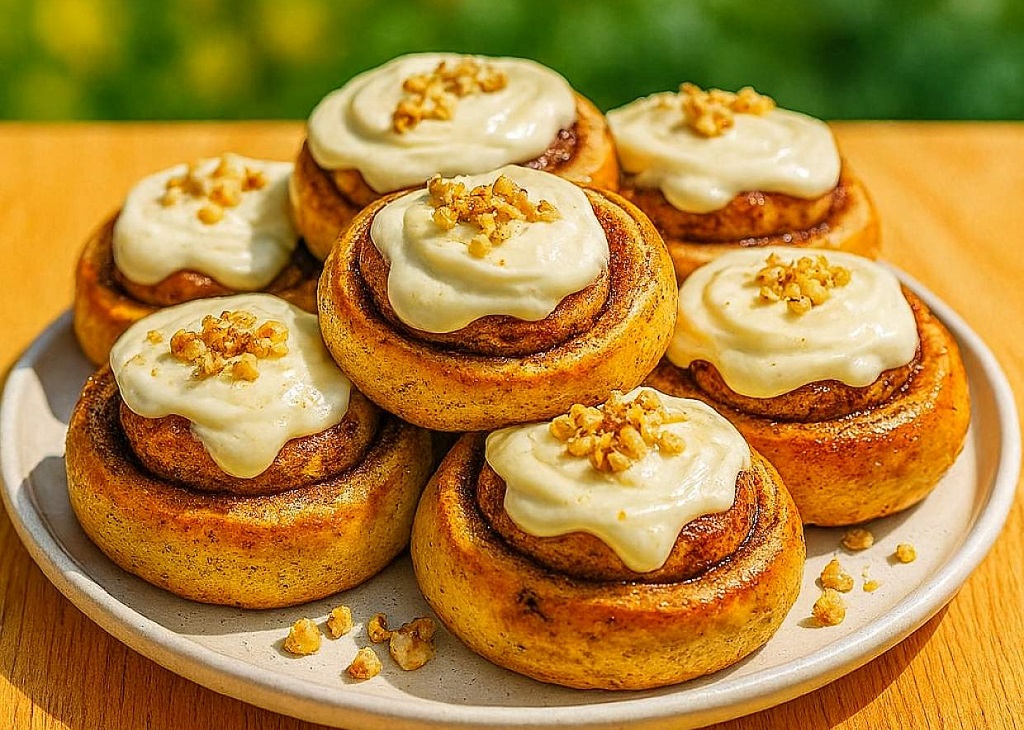
    Freshly baked cinnamon rolls with rich cinnamon filling on a cooling rack
    Delight in the aroma of our freshly baked cinnamon rolls, perfect for a cozy breakfast or sweet dessert!

    Cinnamon Rolls Ingredients

    • Flour (3 cups): Forms the backbone of the dough, providing structure.
    • Sugar (¾ cup + 3 tbsp brown sugar): Sweetens the dough and filling.
    • Ground cinnamon (3 tbsp): Delivers the signature spice that defines these rolls.
    • Warm milk (1 cup): Activates the yeast and enriches the dough’s texture.
    • Instant dry yeast (2 tbsp): The leavening agent that causes the dough to rise.
    • Butter (⅓ stick + ¼ cup melted): Offers moisture and rich flavor to the dough and filling.
    • Salt (1 tsp): Enhances all the flavors within the dough.
    • Egg (1): Binds the ingredients and enriches the dough’s color and texture.

    Detailed Process for Crafting Cinnamon Rolls

    Initiating the Dough

    Start by activating the yeast in warm milk mixed with a tablespoon of sugar; this not only helps the yeast start working but also infuses the milk with a hint of sweetness. This frothy yeast mixture is critical for the dough’s rise and eventual texture.

    Forming the Dough

    Combine the flour, sugar, and salt in one bowl. In another, blend the egg with the softened butter. Gradually integrate the dry and wet ingredients, alternating with the yeast milk mixture, to form a cohesive dough. The real secret lies in kneading; a good 10 minute knead will develop the gluten, essential for creating that classic chewy texture.

    Proofing and Shaping

    Once the dough is smooth and elastic, let it rise in an oiled bowl, covered, until it doubles in size about 1 to 2 hours. Then, roll out the dough, spread the melted butter, sprinkle with brown sugar and cinnamon, and roll up tightly before slicing into individual pieces. This method ensures each roll is packed with sweet, spicy flavors.

    Baking to Perfection

    The shaped rolls should rise once more on their baking tray before they head into the oven. Baking them just until they’re golden brown ensures they stay moist and tender inside. This delicate balance of baking time is crucial for perfect cinnamon rolls.

    Customization Tips for Cinnamon Rolls

    While the traditional cinnamon roll is beloved, adding personal touches can make this recipe your own. Whether it’s a sprinkle of pecans inside the rolls, a dash of cardamom alongside the cinnamon, or even a cream cheese frosting topping, each variation can transform the classic into something uniquely delightful.

    Addressing Common Baking Challenges

    Perfecting cinnamon rolls comes with its challenges, primarily managing yeast activity and dough consistency. Factors like ambient temperature, the freshness of the yeast, and even the type of flour can dramatically affect the outcome. Precise measurements and patience during proofing times are vital to ensure success.

    Ensuring Consistent Results

    Achieving consistent thickness and even baking can also pose a challenge, especially for novice bakers. Using a rolling pin with adjustable rings can help roll the dough to an even thickness, and rotating the baking tray halfway through baking promotes uniform color and doneness.

    The Joy of Homemade Cinnamon Rolls

    The allure of homemade cinnamon rolls goes beyond their warm, comforting aroma; it’s about the joy of creating something from scratch that brings people together. Each ingredient, from the tender flour to the aromatic cinnamon, is chosen to ensure that the end product is not just edible, but memorable. These rolls are a testament to the timeless appeal of baking, where the act itself is as rewarding as the flavors it brings forth.

    A Culinary Delight for All Occasions

    Cinnamon rolls are versatile delights that fit perfectly into any setting, be it a quiet morning breakfast, a family gathering, or a festive celebration. Their sweet, spicy aroma fills the air, promising a bite filled with flavors that are as comforting as they are indulgent. This recipe offers a step by step guide to creating these irresistible treats, ensuring that even novice bakers can achieve professional results.

    Perfect Pairings with Cinnamon Rolls

    To enhance your cinnamon roll experience, consider the beverages and sides that best complement their rich flavors. A hot cup of coffee or a cold glass of milk can balance the sweetness, while a vanilla glaze or cream cheese frosting can add a creamy texture that contrasts beautifully with the crisp exterior. Each pairing is designed to elevate the simple act of enjoying a cinnamon roll into a more complex and satisfying culinary experience.

    Benefits of Baking with Natural Ingredients

    This cinnamon roll recipe emphasizes the use of natural ingredients, which not only impart superior flavor but also offer a healthier alternative to store bought varieties. By controlling the ingredients, such as opting for organic flour or natural sweeteners, you can enjoy these treats with a reduced guilt, knowing exactly what goes into your food.

    Challenges in Achieving Dough Perfection

    One of the primary challenges in creating the perfect cinnamon roll is achieving the right dough consistency. The dough must be soft yet elastic, moist yet not sticky. This balance is crucial as it affects everything from how the dough rolls to how it rises. Mastering the kneading and proofing processes is essential, as under kneaded dough will not develop enough gluten to support the filling, while over proofed dough can collapse under its own weight.

    Maintaining Flavor Balance in Cinnamon Rolls

    Achieving the perfect flavor balance in cinnamon rolls requires precision. Excessive cinnamon can overpower the dough and filling’s delicate flavors, while too little may result in a bland taste. Careful measurement and adjustment of spices are crucial, ensuring they enhance without straying too far from the recipe’s intended proportions. Similarly, the sweetness must be balanced to ensure it complements the cinnamon without overwhelming it.

    Ensuring Even Baking and Browning

    Even baking is essential for cinnamon rolls to prevent them from being too doughy inside or too crisp outside. Achieving this requires a well-calibrated oven, proper placement on the baking sheet, and possibly rotating them to ensure even heat distribution.

    Dealing with Yeast and Environmental Variables

    Working with yeast can be intimidating for many home bakers. The activity of yeast can be affected by a variety of environmental factors, including temperature and humidity. Ensuring the milk is warm enough to activate the yeast, without being so hot that it kills it, is a delicate balance crucial for the dough’s rise.

  • KFC Original Secret Crispy Chicken Recipe

    KFC Original Secret Crispy Chicken Recipe

    If you’ve ever dreamt of replicating that crunchy, golden, KFC-style fried chicken at home, buckle up. As a chef who lives for recreating iconic comfort foods, this recipe was both a challenge and a triumph. I tested it countless times to hit that perfect crisp, that juicy bite, and of course, the unmistakable blend of 11 herbs and spices.

    Why I Love Making KFC Style Crispy Chicken at Home

    There’s something special about taking a fast-food favorite and turning it into a homemade masterpiece. Cooking it myself gives me total control over flavor, crispiness, and quality. Plus, the aroma that fills the kitchen while it’s frying? Absolutely unbeatable.

    • Homemade flavor without artificial additives
    • Customizable spice levels for all palates
    • Perfect for family dinners or crowd-pleasing parties
    • More affordable than takeout with premium taste
    • Guilt-free because you know exactly what’s in it

    Step by Step Guide to Making KFC Original Secret Crispy Chicken

    Ingredients

    • 1 whole chicken, cut into pieces
    • 1 cup all-purpose flour
    • 1 teaspoon salt
    • 1 teaspoon black pepper
    • 1 teaspoon paprika
    • 1 teaspoon garlic powder
    • 1 teaspoon onion powder
    • 1 teaspoon dried oregano
    • 1 teaspoon dried basil
    • 1 teaspoon dried thyme
    • 1 teaspoon mustard powder
    • 1 teaspoon celery salt
    • Vegetable oil, for frying

    Step-by-Step Instructions

    Step 1: In a medium bowl, whisk together all the dry ingredients flour, salt, pepper, paprika, garlic powder, onion powder, oregano, basil, thyme, mustard powder, and celery salt.

    Step 2: Heat your vegetable oil in a deep fryer or large pot. You want it to reach 350°F (175°C). A thermometer here is your best friend.

    Step 3: Take each chicken piece and coat it generously in the flour-spice mixture. Shake off any excess but ensure it’s fully covered. For an extra crunch, you can double dip just coat once, let it rest, then coat again.


    Step 4: Gently place the chicken into the hot oil, a few pieces at a time to avoid overcrowding. Let them fry for 15 to 20 minutes, flipping once halfway, until they’re golden brown and cooked through.

    Step 5: Transfer the chicken to a wire rack over paper towels to drain excess oil. Resist the urge to place them directly on paper towels that can trap steam and soften the crust.

    Step 6: Serve piping hot. I always sprinkle a tiny pinch of salt over them while they’re still hot it brings out all the spice notes.

    Crispy golden KFC-style fried chicken on a wire rack
    Crispy, golden fried chicken made with the secret blend of 11 spices

    Chef’s Notes and Troubleshooting Tips

    • Too much oil splatter? Pat your chicken dry before flouring it. Moisture causes violent bubbling.
    • Chicken not crispy enough? Make sure your oil stays hot. A temperature drop equals soggy crust.
    • Uneven cooking? Use uniform chicken sizes. Thin wings cook much faster than thick thighs.

    As a chef, patience is key here. I had to practice the fry timing, balance the seasoning, and get that skin-to-meat ratio just right. But trust me when it’s right, it’s unforgettable.

    How to Make Your Fried Chicken Stand Out

    Want to elevate your homemade KFC-style chicken even further? Here’s how I take mine from good to next-level:

    • Add a splash of buttermilk to your flour mix for tender meat.
    • Marinate your chicken in seasoned brine for 6-8 hours before frying.
    • Include a pinch of white pepper and MSG if you’re going for authenticity.
    • Sprinkle a little cayenne if you want a spicy kick.
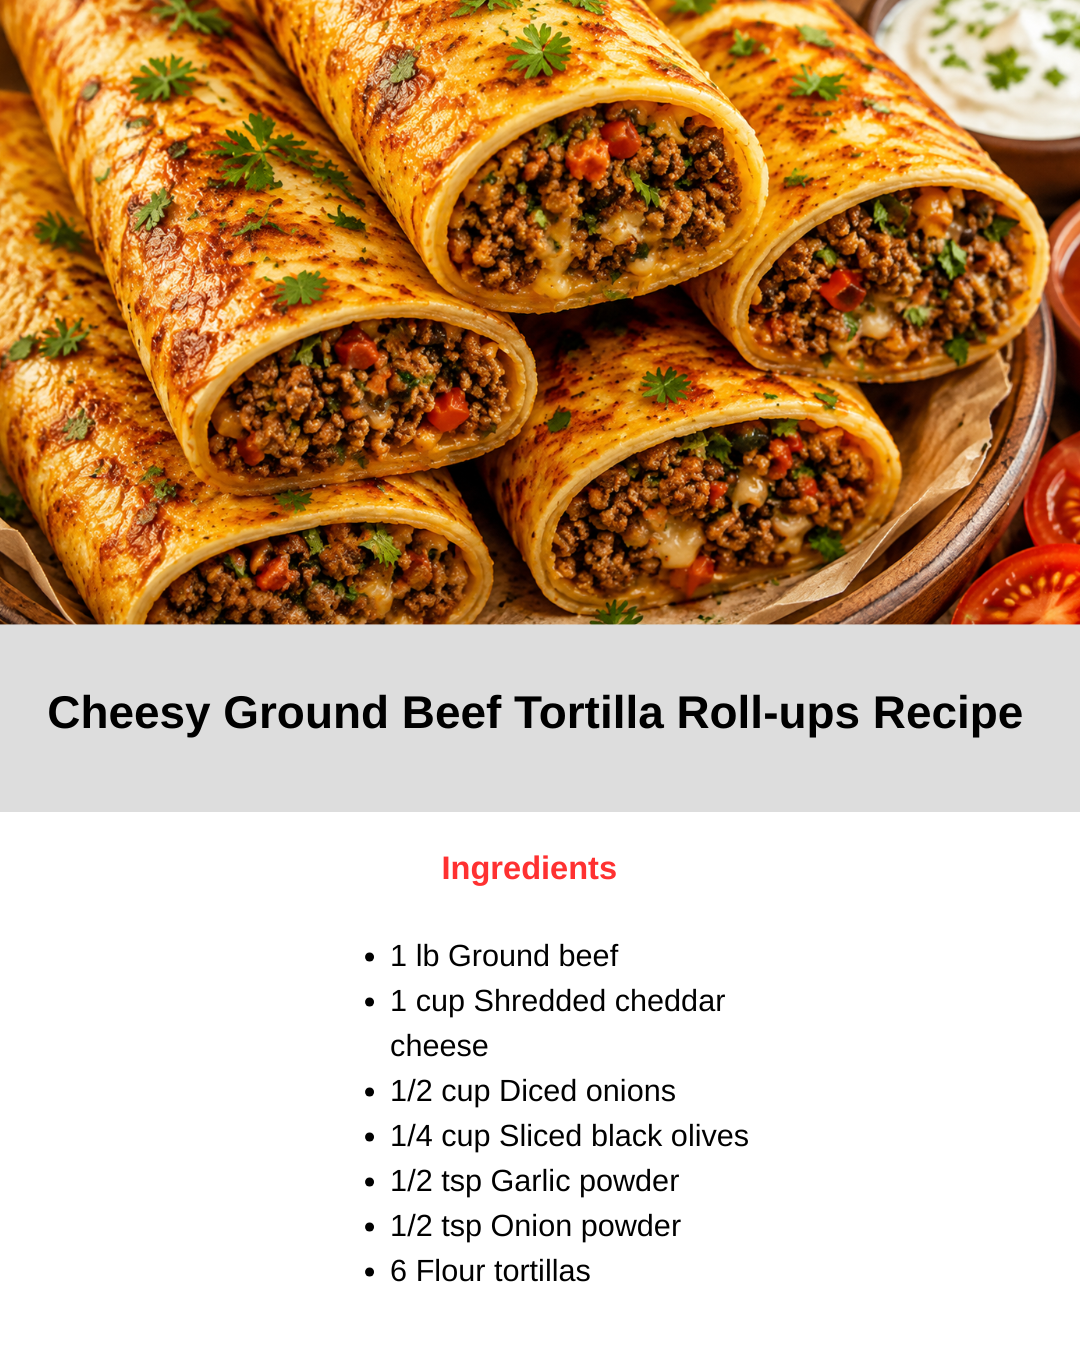
  • Cheesy Ground Beef Tortilla Roll-ups Recipe

    Cheesy Ground Beef Tortilla Roll-ups Recipe

    Cheesy Ground Beef Tortilla Roll Ups recipe is a delicious and savory dish that will impress your family and friends.

    Transitioning to a professional chef, I have perfected this recipe, infusing it with flavorful spices.

    The filling is a harmonious blend of ground beef, gooey cheese, and zesty seasonings. I love to serve these roll ups alongside my Quick Blitz Puff Pastry Dough and pair them with a side of my famous Chewy One Bowl Oatmeal Cookies Recipe or Salted Vanilla Oatmeal Cookies Recipe.

    Why This Cheesy Ground Beef Tortilla Roll Ups recipe Works

    Discover the key elements that make these roll ups a crowd favorite: the combination of savory ground beef, gooey melted cheese, and warm tortillas. This recipe works because it offers a satisfying blend of flavors and textures that is perfect for weeknight dinners or party appetizers.

    • Preparation: Browning the ground beef with aromatic spices creates a flavorful base.
    • Assembly: Layering the beef and cheese onto tortillas ensures each bite is packed with deliciousness.
    • Baking: Rolling up the tortillas and baking them until golden and crispy locks in the flavors.

    Step by Step Guide to Making Cheesy Ground Beef Tortilla Roll Ups

    Ingredients

    Master the art of creating these delightful roll ups with these detailed steps:

    • 1 lb Ground beef
    • 1 cup Shredded cheddar cheese
    • 1/2 cup Diced onions
    • 1/4 cup Sliced black olives
    • 1/2 tsp Garlic powder
    • 1/2 tsp Onion powder
    • 6 Flour tortillas
    • To taste Salt and pepper

    Instructions

    Follow these simple steps to enjoy these Cheesy Ground Beef Tortilla Roll Ups:


    Preparing the Filling

    • In a skillet, cook the ground beef until browned. Drain excess fat.
    • Add onions, olives, garlic powder, onion powder, salt, and pepper. Cook until onions are soft.
    • Remove from heat and stir in cheddar cheese until melted.

    Rolling the Tortillas

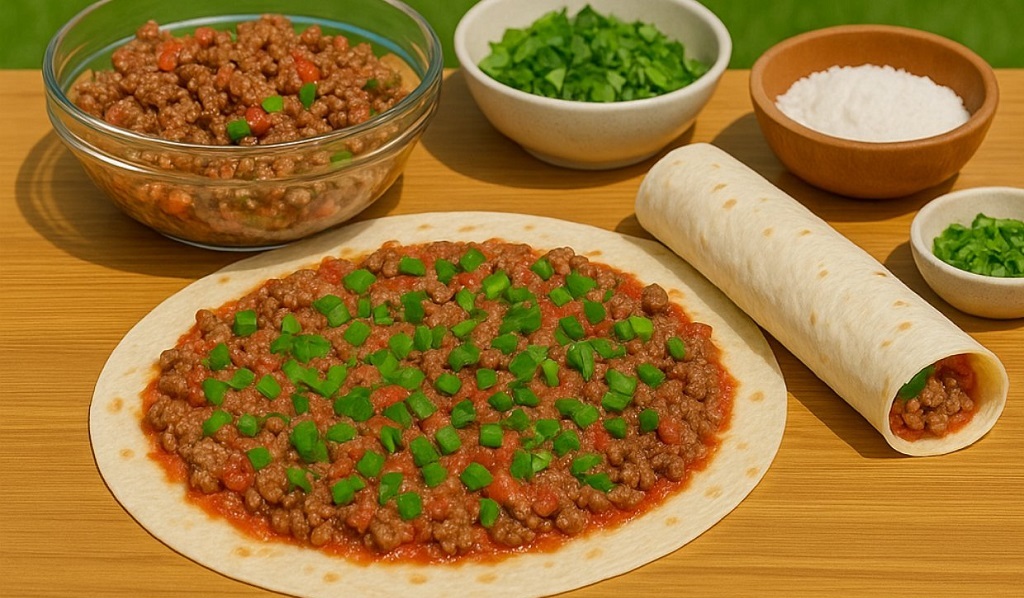
    • Place a spoonful of the beef mixture onto each tortilla and roll up tightly.
    • Arrange the roll ups seam side down in a baking dish.
    • Sprinkle extra cheese on top if desired.

    Baking and Serving

    • Bake in a preheated oven at 350°F for 15-20 minutes until heated through.
    • Serve hot with your favorite toppings and sides.
    Cheesy Ground Beef Tortilla Roll-ups

    Preparation and Cooking

    Prepare Ingredients

    To start the cooking process for the Cheesy Ground Beef Tortilla Roll Ups recipe, gather all the required ingredients such as ground beef, tortillas, cheese, and seasonings from the pantry. Chop the vegetables and measure out the spices for easy access.

    Cooking Instructions

    In a skillet over medium heat, cook the ground beef until browned. Add in the vegetables and spices, sautéing until softened. Assemble the tortilla roll ups by placing a spoonful of the beef mixture and cheese onto each tortilla before rolling them up tightly. Bake in the oven until crispy and golden.

    Serving Tortilla Roll Ups

    Serving Suggestions

    • For a vibrant brunch spread, serve your Cheesy Ground Beef Tortilla Roll Ups recipe alongside Butter Cake Recipe.
    • Create a flavorful snack platter with your Cheesy Ground Beef Tortilla Roll Ups recipe and Mini Sugar Doughnuts recipe.

    Enhanced Presentation

    • Transform your meal into an elegant affair by pairing the Cheesy Ground Beef Tortilla Roll Ups recipe alongside Crispy Potato Slices recipe.
    • Elevate the flavors with a side of fresh salsa and guacamole to complement your Cheesy Ground Beef Tortilla Roll Ups recipe.

    Nutritional Information

    Check out the nutritional breakdown of this flavorful dish: The Cheesy Ground Beef Tortilla Roll Ups recipe is a balanced option for your mealtime. This dish provides essential nutrients such as protein, fiber, and calcium. For more delicious and nutritious recipes, try out the Sweet Potato Meryenda Recipe For Business, the Pineapple Heaven Cake Recipe With Crushed Pineapple Topping, and the Oatmeal And Apple Breakfast Recipe For Weight Loss.

    Nutrient Amount per serving
    Calories 350
    Protein 25g
    Fiber 4g
    Calcium 20% DV

    Tips and Tricks

    Enhance your cooking skills with these handy tips and tricks:

    Knife Skills

    Chop Practice precision
    Julienne Create uniform cuts
    Bruise Release flavors

    Food Safety

    Separate Prevent cross contamination
    Chill Maintain freshness
    Chef’s Tip Use a food thermometer

    Garnishing Ideas for Tortilla Roll Ups

    Garnishing Ideas

    Elevate the visual appeal of your dish with these innovative garnishing ideas. When making your Chip Cookies Recipe, consider adding a sprinkle of crushed nuts for an extra crunch and a touch of elegance.

    Decorative Garnishes

    For your Cheesy Ground Beef Tortilla Roll Ups recipe, fresh herbs like parsley or cilantro can provide a pop of color and freshness. Additionally, sliced cherry tomatoes or a drizzle of balsamic glaze add a gourmet touch to the dish.

    Storage and Reheating

    Storing Leftovers

    • After making the Cheesy Ground Beef Tortilla Roll Ups recipe, let them cool to room temperature.
    • Place the roll ups in an airtight container or wrap them tightly in foil to prevent drying out.
    • Store them in the refrigerator for up to 3 days for optimal freshness.
    • For longer storage, freeze the roll ups for up to 2 months.

    Reheating Instructions

    • To reheat your Cheesy Ground Beef Tortilla Roll Ups, preheat the oven to 350°F.
    • Place the roll ups on a baking sheet and cover with foil to prevent over browning.
    • Bake for about 10-15 minutes or until heated through.
    • Serve hot and enjoy your delicious meal!
  • This Lemon Cake Is Taking the Internet by Storm!

    This Lemon Cake Is Taking the Internet by Storm!

    Ingredients: Flour – 230-250 g (1¾-2 cups) Eggs – 3 Butter – 100 g (7 tbsp) Vegetable oil – 60 ml (¼ cup) Sugar – 160 g (¾ cup + 1 tbsp) Salt – a pinch Vanilla sugar Baking powder – 10 g (2 tsp) Lemon zest Lemon juice – 2 tbsp


  • Healthy Cocoa Banana Oat Dessert

    Healthy Cocoa Banana Oat Dessert

    If there’s one dessert I turn to when I want something wholesome, decadent, and totally guilt free, it’s this gluten free, no sugar, no butter cocoa oat banana bake. With just a handful of clean ingredients, this recipe transforms pantry basics into a rich, moist, and deeply satisfying treat. No flour, no refined sugar, no butter yet it tastes like something you’d serve at a café.

    Why I Love Baking This on Repeat

    This recipe is everything I want in a dessert fast to mix, made with simple ingredients, and incredibly adaptable. Whether I’m serving kids after school, prepping snacks for a hike, or just curbing my own late night craving, this one always delivers. The bananas give natural sweetness, oats bring in fiber, cocoa makes it rich, and the nuts add a perfect soft crunch.

    • No sugar needed: Bananas bring natural sweetness
    • No flour or gluten: Rolled oats provide structure and texture
    • Flexible ingredients: Works with carob, vegan egg, or different nuts
    • One bowl + bake: Simple process, easy cleanup

    Ingredients You’ll Need

    • 120 g (1½ cup) rolled oats ?
    • 250 ml (1 cup) hot milk (dairy or plant based) ?
    • 2 medium ripe bananas ?
    • 2 eggs or vegan substitute (like flax eggs) ?
    • 4 tbsp cocoa or carob powder (45 g) ?
    • Pinch of salt ?
    • 1 tbsp baking powder
    • 40 g (⅓ cup) chopped nuts (walnuts, pecans, almonds) ?

    How I Make This Dessert

    Step by Step Process

    • Soak the oats: Mix the rolled oats with hot milk in a large bowl. Let sit for 10 minutes to soften and bind.
    • Prepare the banana mix: In a second bowl, mash bananas until smooth. Add eggs or flax eggs and mix well.
    • Add cocoa + dry ingredients: Stir cocoa, baking powder, and a pinch of salt into the banana mixture.
    • Combine wet and dry: Pour banana cocoa mixture into the soaked oats. Stir until fully blended.
    • Fold in the nuts: Add your chopped nuts of choice and stir lightly to combine.
    • Bake: Pour batter into a greased or parchment lined baking dish. Bake at 180°C (360°F) for about 40 minutes, or until a toothpick comes out clean.
    • Cool + slice: Let cool slightly before cutting. Serve warm or at room temperature.
    Slices of chocolate banana oat bake on a cooling rack with cocoa powder sprinkled
    Moist chocolate oat bars made with banana, cocoa, and no sugar or flour

    Chef Tips for Best Results

    • Use ripe bananas: The browner, the better for sweetness and moisture
    • Choose quality cocoa: It gives a rich depth that makes this feel indulgent
    • Let it rest: After baking, a short rest helps it firm up and slice cleanly
    • Try carob powder: For a naturally sweet alternative that’s caffeine free

    Variations I Recommend

    Customize It to Your Cravings

    • Chocolate chip version: Add ¼ cup dark chocolate chips before baking
    • Berry banana bake: Fold in ½ cup blueberries or raspberries
    • Spiced twist: Add ½ tsp cinnamon or chai spice blend
    • Nut free: Use sunflower seeds or skip the nuts entirely

    Sometimes I even spread a thin layer of peanut butter or tahini on top before baking it adds richness and looks amazing when sliced. These tricks are the same I use in our 5 minute oat pancakes to keep things fresh without making new recipes from scratch.

    Perfect for Meal Prep

    • Freezer friendly: Slice into bars and store in freezer safe bags
    • Reheat friendly: Warm a slice in the microwave or toaster oven for 1-2 minutes
    • Snack box staple: Great for kids and adults as a midday energy boost

    I often bake it Sunday evening and have dessert for the entire week or breakfast, because it’s that balanced. The oats and bananas hold up perfectly in storage, and each slice is just as moist on day four as it was fresh out of the oven.

    Serving Suggestions for Every Occasion

    Dress It Up or Keep It Simple

    This cocoa oat banana bake is one of those desserts that adapts to the moment. When I’m just baking for myself, I enjoy it plain with a cup of black tea or oat milk. But when I’m hosting guests or prepping for family dinners, I elevate it with toppings and sides that make it look and taste extra indulgent all without compromising its clean ingredients.

    • With Greek yogurt: Spoon some plain or vanilla yogurt over a warm slice
    • With berries: Add fresh raspberries, strawberries, or sliced banana on the side
    • With nut butter drizzle: Peanut, almond, or tahini work beautifully
    • With vegan whipped cream: For a decadent but dairy free finish
    • With honey or maple: A light drizzle boosts sweetness naturally

    It also makes a beautiful addition to dessert boards or clean eating brunch platters. I often pair it with slices of our no mixer banana bread or squares of condensed milk cake for variety.

    Common Mistakes and How I Avoid Them

    Problem Cause How to Fix
    Too wet or mushy Bananas too large or not enough baking time Use medium bananas and bake until toothpick comes out clean
    Crumbly texture Oats not soaked properly or too little binder Soak oats fully in hot milk and use both eggs (or solid vegan subs)
    Flat flavor Bananas under ripe or weak cocoa Use ripe bananas and a strong unsweetened cocoa or carob
    Dense center Underbaking or batter too thick Ensure oven is fully preheated and batter is spread evenly
    Burnt edges Baking dish too dark or too close to top heat Use light metal or ceramic pans and bake in center of oven

    Why This Dessert Works for Every Diet

    Gluten Free and Dairy Free Friendly

    Because there’s no flour or butter, this dessert is a go to when I’m cooking for people with dietary restrictions. Just make sure your oats are labeled gluten free (many are processed in shared facilities). You can also use any plant milk you like almond, soy, oat, or even coconut milk all work perfectly. For egg free versions, I’ve had great success with flax eggs or chia eggs they keep the batter moist and bind well.

    • Vegan version: Use 2 flax eggs and plant milk
    • Nut free: Omit nuts or replace with seeds like sunflower or pumpkin
    • Sugar free: Keep it banana sweetened or use dates if you want extra richness

    How I Make This for Kids and Guests

    Kids love anything with cocoa and banana, so this recipe is already a hit in most households. I make it more exciting by slicing it into bars and letting kids drizzle their own toppings yogurt, honey, or nut butters. For guests, I cut it into neat squares, plate with a mint sprig and berry compote, and serve it slightly warm with coffee or spiced tea.

    • School lunch approved: Wrap bars in parchment and pack with apple slices
    • Post dinner treat: Serve with herbal tea and a dusting of cinnamon
    • Holiday platter: Cut into stars or rectangles and add dried cranberries on top
  • Italian-Style Fluffy Sweet Pie with Cream

    Italian-Style Fluffy Sweet Pie with Cream

    Italian-Style Fluffy Sweet Pie with Cream

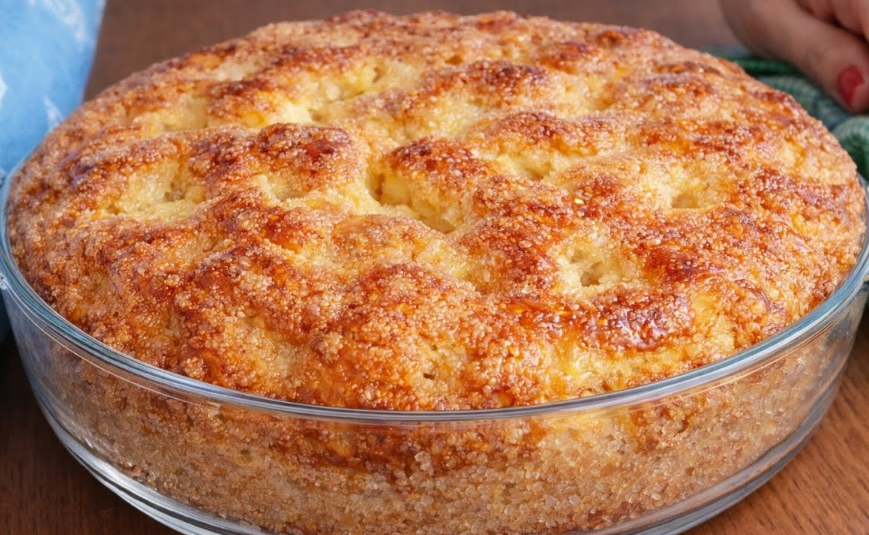
    This Italian-style fluffy sweet pie is the kind of homemade pastry that fills the kitchen with an irresistible buttery aroma while it bakes. Soft, light, and beautifully tender, it combines a yeast-based dough with a rich buttery sugar topping and a final touch of cream for an especially delicious texture.

    The dough is made with warm milk, eggs, butter, and yeast, creating a soft and airy base. Before baking, it is finished with sugar and additional butter, giving the pastry a rich sweetness and a wonderfully indulgent finish. Cream adds the final touch, helping create a moist, tender pastry that is perfect for sharing.

    Serve this fluffy homemade pie for breakfast, afternoon tea, dessert, or whenever you’re craving a comforting baked treat. It pairs beautifully with coffee or tea and is an excellent choice for family gatherings or a relaxed weekend bake.

    Ingredients

    For the Dough

    • 200 ml warm milk
    • 2 tbsp sugar
    • 2 tsp dry yeast
    • 2 large eggs
    • ½ tsp salt
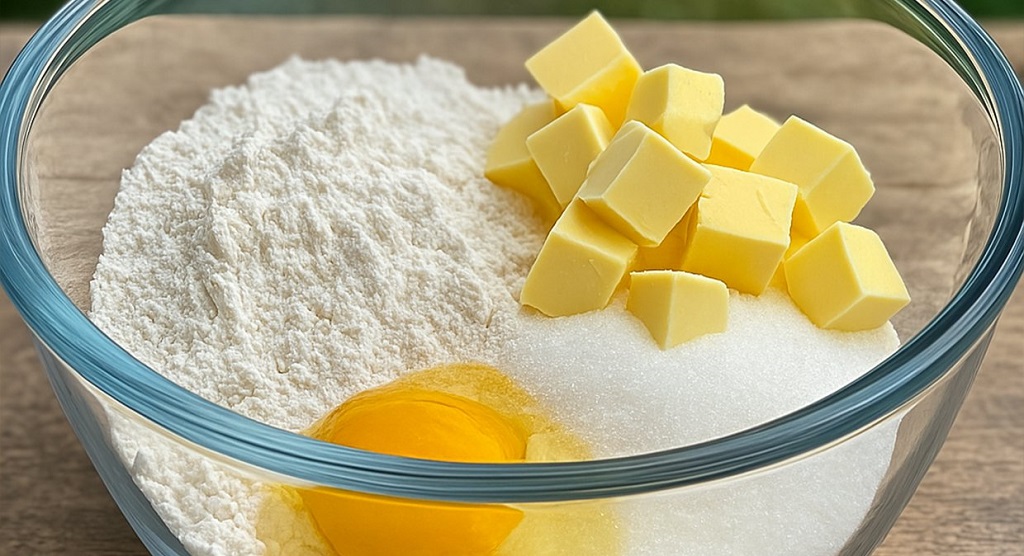
    • 120 g soft butter
    • 470 g all-purpose flour

    For the Topping

    • 120 g sugar
    • 50 g soft butter

    For Finishing

    • 150 ml cream (11% fat)

    Instructions

    1. Activate the yeast.
      Pour the warm milk into a large mixing bowl. Add 2 tablespoons of sugar and the dry yeast. Stir gently and allow the mixture to rest briefly until the yeast begins to activate.
    2. Add the eggs and salt.
      Add the eggs and salt to the yeast mixture. Whisk until everything is well combined.
    3. Add the butter.
      Mix in 120 g of softened butter. Continue mixing until it is incorporated into the wet ingredients.
    4. Add the flour.
      Gradually add the flour while mixing. Once the dough becomes too thick to mix easily, begin kneading until a soft, smooth dough forms.
    5. Let the dough rise.
      Cover the dough and leave it in a warm place until it becomes noticeably light and puffy.
    6. Shape the pastry.
      Transfer the risen dough to a prepared baking pan. Gently spread and shape it evenly in the pan.
    7. Add the butter and sugar topping.
      Distribute the remaining 50 g of softened butter over the dough, then sprinkle 120 g of sugar evenly over the surface.
    8. Bake.
      Bake in a preheated oven at 180°C (356°F) for approximately 35 minutes, or until the pastry is beautifully risen and golden brown.
    9. Finish with cream.
      Carefully pour the cream over the hot baked pastry, distributing it evenly so it can soak into the surface.
    10. Cool slightly and serve.
      Allow the pastry to rest for a short time so the cream can absorb. Serve warm or at room temperature.

    Tips for the Best Fluffy Pastry

    Make sure the milk is warm rather than hot. Milk that is too hot can damage the yeast and prevent the dough from rising properly.

    The butter should be soft enough to incorporate easily into the dough. If it is too cold, it may be difficult to mix evenly.

    When adding the flour, avoid adding significantly more than necessary. A softer dough generally produces a lighter and more tender finished pastry.

    Give the dough enough time to become visibly airy before baking. The exact rising time can vary depending on the temperature of your kitchen.

    Serving Suggestions

    This sweet Italian-style pastry is especially delicious while still slightly warm, when the crumb is soft and the creamy topping is at its best.

    Serve slices alongside freshly brewed coffee, cappuccino, or tea. For an extra-special dessert, pair it with fresh berries or other seasonal fruit.

    Storage

    Allow any leftover pastry to cool completely before storing it in an airtight container. Because the finished pastry contains cream, refrigeration is the safest option for longer storage.

    For the best texture, allow refrigerated slices to come closer to room temperature before serving, or warm them gently.

    Recipe at a Glance

    Recipe: Italian-Style Fluffy Sweet Pie
    Type: Sweet Yeast Pastry
    Oven Temperature: 180°C (356°F)
    Baking Time: Approximately 35 minutes
    Texture: Soft, fluffy, buttery, and moist
    Best Served: Warm or at room temperature
    Perfect With: Coffee or tea


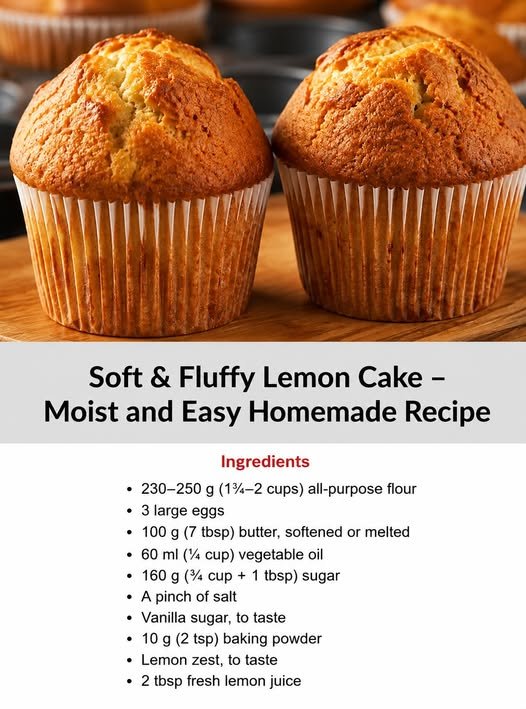
  • Soft & Fluffy Lemon Cake – Moist and Easy Homemade Recipe

    Soft & Fluffy Lemon Cake – Moist and Easy Homemade Recipe

    Soft & Fluffy Lemon Cake – Moist and Easy Homemade Recipe

    This soft and fluffy lemon cake is the perfect homemade treat for anyone who loves fresh citrus flavor. Made with real lemon zest and lemon juice, every slice has a bright, refreshing aroma and a delicious balance of sweetness and tanginess.

    A combination of butter and vegetable oil gives this cake the best of both worlds. Butter adds a rich homemade flavor, while oil helps keep the crumb wonderfully soft and moist. The result is a tender lemon cake that tastes just as good the next day.

    Simple ingredients and an uncomplicated preparation make this recipe ideal for everyday baking. Serve it with a cup of coffee or tea, enjoy a slice as an afternoon snack, or make it as an easy dessert for family and friends. Once you try this classic homemade lemon cake, it may quickly become one of your favorite citrus desserts.

    Ingredients

    • 230–250 g (1¾–2 cups) all-purpose flour
    • 3 large eggs
    • 100 g (7 tbsp) butter, softened or melted
    • 60 ml (¼ cup) vegetable oil
    • 160 g (¾ cup + 1 tbsp) sugar
    • A pinch of salt
    • Vanilla sugar, to taste
    • 10 g (2 tsp) baking powder
    • Lemon zest, to taste
    • 2 tbsp fresh lemon juice

    Instructions

    1. Prepare the oven and baking pan.
      Preheat your oven to 175°C (350°F). Grease and flour a cake pan or line it with parchment paper to make removing the cake easier after baking.
    2. Beat the eggs and sugar.
      Place the eggs, sugar, vanilla sugar, and a pinch of salt in a large mixing bowl. Beat until the mixture becomes pale, slightly thick, and fluffy.
    3. Add the butter and oil.
      Gradually add the butter and vegetable oil. Mix until the ingredients are well incorporated and the mixture is smooth.
    4. Add the lemon flavor.
      Stir in the fresh lemon zest and 2 tablespoons of lemon juice. Mix briefly to distribute the citrus flavor throughout the batter.
    5. Combine the dry ingredients.
      In a separate bowl, combine 230 g of flour with the baking powder. Gradually add the dry ingredients to the wet mixture and gently mix until just combined. If the batter appears too thin, add a little of the remaining flour as needed.
    6. Transfer the batter to the pan.
      Pour the cake batter into the prepared baking pan and gently smooth the surface with a spatula.
    7. Bake the lemon cake.
      Bake until the cake is golden, risen, and a toothpick inserted into the center comes out clean. Baking time will depend on the size and shape of your pan, so begin checking the cake as it approaches doneness.
    8. Cool before serving.
      Allow the cake to cool in the pan for several minutes before transferring it to a wire rack. Let it cool before slicing for the best texture.

    Tips for a Soft and Moist Lemon Cake

    For the freshest lemon flavor, use finely grated zest from a fresh lemon. Grate only the yellow outer layer of the peel and avoid the bitter white pith underneath.

    Start with 230 g of flour and add more only if necessary. Flour can absorb moisture differently depending on the brand and how it is measured, so adjusting the amount slightly can help achieve the right batter consistency.

    Avoid overmixing once the flour has been added. Gentle mixing helps preserve the light texture and keeps the finished cake tender and fluffy.

    For an even stronger citrus flavor, you can finish the cooled cake with a simple lemon glaze or a light dusting of powdered sugar.

    Serving Suggestions

    Serve this homemade lemon cake at room temperature with coffee, black tea, or your favorite herbal tea. Its fresh citrus flavor also pairs beautifully with berries, whipped cream, or a spoonful of plain or vanilla yogurt.

    For a simple presentation, dust the top with powdered sugar and garnish with a little freshly grated lemon zest before serving.

    Storage

    Keep the cooled lemon cake in an airtight container to prevent it from drying out. It can be stored at room temperature for a short period or refrigerated for longer storage.

    If refrigerated, bring the cake to room temperature before serving to help restore its wonderfully soft and tender texture.

    Recipe at a Glance

    Recipe: Soft & Fluffy Lemon Cake
    Main Flavor: Fresh lemon
    Texture: Soft, fluffy, and moist
    Key Ingredients: Lemon zest, lemon juice, butter, and oil
    Serving Idea: Perfect with coffee or tea
    Difficulty: Easy


  • Grandma’s Yogurt Cake – Soft, Moist & Easy

    Grandma’s Yogurt Cake – Soft, Moist & Easy

    Grandma’s Yogurt Cake – Soft, Moist & Easy

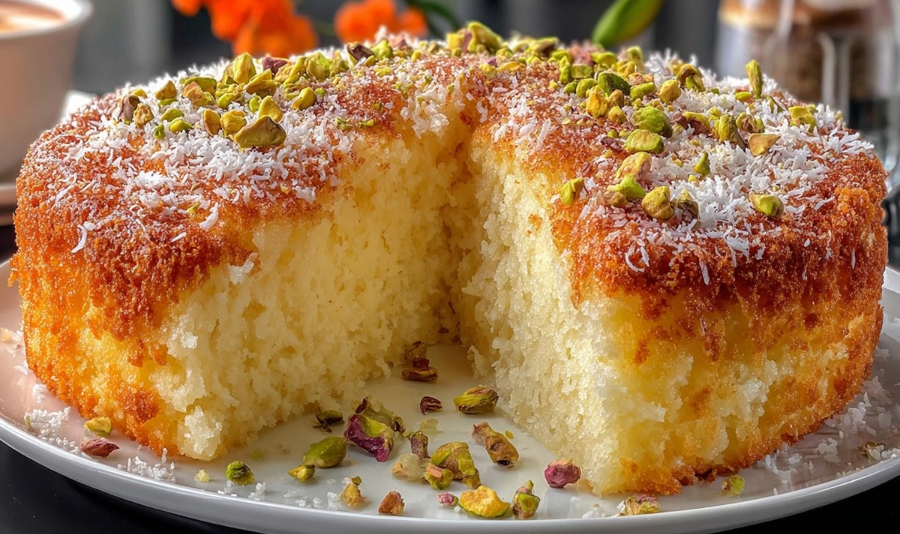
    Grandma’s Yogurt Cake is one of those simple homemade desserts that proves you don’t need complicated ingredients to make something truly delicious. Made with creamy yogurt, fresh lemon, and a touch of vanilla, this cake comes out wonderfully soft, moist, and fluffy every time.

    The yogurt gives the cake a tender texture and helps keep it moist, while lemon zest and juice add a fresh citrus flavor that balances the sweetness beautifully. Finished with coconut flakes and chopped pistachios, every slice has a lovely combination of flavor and texture.

    This easy yogurt cake is perfect for serving with coffee or tea, enjoying as an afternoon treat, or preparing when you need a simple dessert for family and guests. With just a few everyday ingredients and minimal preparation, it’s the kind of classic recipe you’ll want to make again and again.

    Ingredients

    • 3 large eggs
    • A pinch of salt
    • 150 g (3/4 cup) sugar
    • A little vanilla or vanilla extract
    • 120 ml (1/2 cup) oil
    • 240 g (1 cup) plain yogurt
    • Lemon zest, to taste
    • Lemon juice, to taste
    • 300 g (2 1/3 cups) all-purpose flour
    • 15 g baking powder
    • Coconut flakes, for topping
    • Chopped pistachios, for topping

    Equipment

    • 24 cm (approximately 9.5-inch) round baking pan
    • Large mixing bowl
    • Whisk or electric mixer
    • Spatula

    Instructions

    1. Prepare the oven and pan.
      Preheat your oven to 175°C (350°F). Grease a 24 cm round baking pan and lightly flour it, or line the bottom with parchment paper.
    2. Beat the eggs and sugar.
      Add the eggs, sugar, and a pinch of salt to a large mixing bowl. Beat until the mixture becomes lighter in color and slightly fluffy.
    3. Add the wet ingredients.
      Pour in the oil and add the yogurt and vanilla. Mix until everything is smooth and well combined.
    4. Add the lemon.
      Stir in the lemon zest and lemon juice. The fresh lemon adds a light citrus flavor that pairs beautifully with the yogurt.
    5. Add the dry ingredients.
      Add the flour and baking powder to the wet mixture. Gently mix until you have a smooth cake batter. Avoid overmixing, as this can make the finished cake less tender.
    6. Transfer to the baking pan.
      Pour the batter into the prepared 24 cm baking pan and spread it evenly with a spatula.
    7. Add the toppings.
      Sprinkle coconut flakes and chopped pistachios over the top of the batter.
    8. Bake.
      Bake in the preheated oven at 175°C (350°F) for approximately 35–40 minutes, or until the cake is golden and a toothpick inserted into the center comes out clean.
    9. Cool and serve.
      Allow the cake to cool slightly in the pan before removing it. Let it cool further before slicing and serving.

    Tips for the Best Yogurt Cake

    Use plain, creamy yogurt for the best texture. Ingredients at room temperature also combine more evenly and can help create a softer cake.

    Once you add the flour, mix the batter only until everything is combined. Overmixing can develop too much gluten and make the cake denser instead of light and fluffy.

    Because ovens can vary, begin checking the cake around the 35-minute mark. If a toothpick inserted into the center comes out clean or with only a few moist crumbs, the cake is ready.

    Serving Suggestions

    This yogurt cake tastes wonderful on its own, but you can also serve it with a light dusting of powdered sugar. For an extra-special dessert, pair a slice with fresh berries, whipped cream, or a spoonful of yogurt.

    It’s especially delicious alongside a hot cup of coffee or tea, making it a lovely choice for breakfast, afternoon tea, dessert, or casual family gatherings.

    Storage

    Store leftover yogurt cake in an airtight container at room temperature for a short period or refrigerate it for longer storage. If refrigerated, allow individual slices to come closer to room temperature before serving for a softer texture.

    Recipe at a Glance

    Cake: Grandma’s Yogurt Cake
    Pan Size: 24 cm (9.5-inch) round pan
    Oven Temperature: 175°C (350°F)
    Baking Time: 35–40 minutes
    Texture: Soft, moist, and fluffy
    Flavor: Sweet, creamy, and lightly lemony