Category: Cake Recipe

  • 3-Ingredient Apple Cake

    3-Ingredient Apple Cake

    3-Ingredient Apple Cake

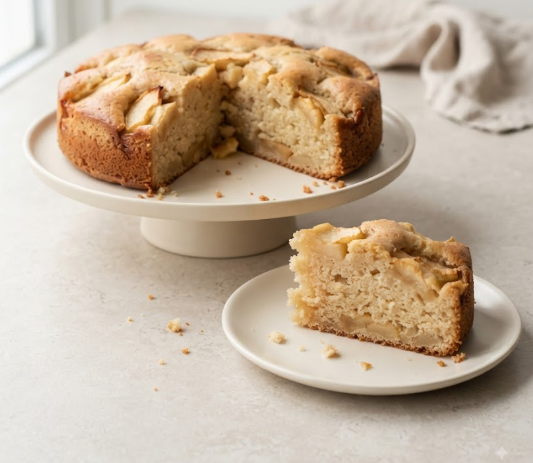
    This 3-Ingredient Apple Cake is one of the easiest apple desserts you can make. With just fresh apples, a box of spice cake mix, and eggs, you get a soft, moist cake filled with sweet apple pieces and warm fall flavor.

    There’s no need to measure flour, sugar, oil, butter, or spices for the basic recipe. Simply mix the ingredients, spread the batter into a baking dish, and bake. It’s an easy dessert for busy weeknights, fall gatherings, potlucks, Thanksgiving season, or whenever you have a few apples waiting to be used.

    Serve this simple apple cake as-is, dust it with powdered sugar, or add a scoop of vanilla ice cream for an extra-special treat.

    Recipe Details

    Prep Time: 10 minutes
    Bake Time: 35–45 minutes
    Cooling Time: 20 minutes
    Total Time: About 1 hour 15 minutes
    Servings: 12
    Course: Dessert, Snack
    Cuisine: American
    Method: Baking
    Difficulty: Easy

    Ingredients

    • 1 box (15.25 ounces) spice cake mix
    • 3 large eggs
    • 3 cups peeled and finely diced apples

    That’s it! You only need three ingredients for the basic recipe.

    Instructions

    1. Preheat the Oven

    Preheat the oven to 350°F.

    Grease a 9×13-inch baking dish with nonstick cooking spray.

    For easier removal, you can line the pan with parchment paper and lightly grease the parchment.

    2. Prepare the Apples

    Peel and core the apples, then cut them into small pieces, approximately 1/4 to 1/2 inch in size.

    Smaller pieces distribute more evenly throughout the cake and soften nicely while baking.

    Measure out approximately 3 cups of diced apples.

    3. Beat the Eggs

    Crack the eggs into a large mixing bowl.

    Whisk for about 30 seconds, until the yolks and whites are completely combined.

    4. Add the Cake Mix

    Add the dry spice cake mix directly to the eggs.

    Don’t prepare the cake mix according to the instructions printed on the package. You won’t need the water or oil normally listed on the box.

    Stir until partially combined.

    The mixture will be very thick at this stage.

    5. Fold in the Apples

    Add the diced apples to the bowl.

    Use a sturdy rubber spatula or wooden spoon to fold the apples into the cake mixture.

    As you continue mixing, moisture from the apples will help loosen the batter.

    The finished batter will still be thicker than traditional cake batter. That’s normal.

    6. Fill the Baking Dish

    Transfer the apple cake batter to the prepared 9×13-inch pan.

    Spread it into an even layer, making sure the apples are distributed throughout the pan.

    7. Bake

    Bake at 350°F for approximately 35–45 minutes, or until the top is set and a toothpick inserted into a cakey portion near the center comes out clean or with a few moist crumbs.

    Because there are pieces of juicy apple throughout the cake, a toothpick inserted directly into an apple may come out wet.

    Begin checking around 35 minutes and avoid overbaking.

    8. Cool

    Remove the cake from the oven and place the pan on a wire rack.

    Let it cool for at least 20 minutes before slicing.

    The cake will become easier to cut as it cools.

    Serve slightly warm or at room temperature.

    Tips for the Best 3-Ingredient Apple Cake

    Choose good baking apples. Firm apples hold their texture better during baking and prevent the cake from becoming overly mushy.

    Dice the apples fairly small. Smaller pieces cook more evenly and distribute apple flavor throughout every slice.

    Measure the prepared apples. Apple sizes vary significantly, so measuring 3 cups after peeling, coring, and chopping gives more consistent results.

    Use the cake mix dry. Don’t add the oil or water listed in the package directions.

    Expect thick batter. This recipe gets much of its moisture from the fresh apples, so the batter won’t look like standard boxed cake batter.

    Don’t overmix. Once the apples and cake mix are evenly incorporated, stop mixing.

    Don’t overbake. The apples help keep the cake moist, but excessive baking can still dry it out.

    What Are the Best Apples for Apple Cake?

    Apples that stay relatively firm during baking work especially well.

    Good options include:

    • Granny Smith
    • Honeycrisp
    • Pink Lady
    • Braeburn
    • Fuji
    • Gala

    Granny Smith apples provide a tart contrast to the sweet cake mix, while Honeycrisp and Fuji produce a sweeter cake.

    You can also combine two varieties for a more complex apple flavor.

    Can I Use Yellow Cake Mix?

    Yes.

    Spice cake mix is especially convenient because cinnamon and warm spices are already included, but yellow cake mix can also work.

    If you use yellow cake mix and don’t mind adding a fourth ingredient, stir 1–2 teaspoons ground cinnamon into the dry mix for a more traditional apple-cinnamon flavor.

    Optional Add-Ins

    The basic cake needs only three ingredients, but you can easily customize it.

    Try adding:

    • 1/2 cup chopped pecans
    • 1/2 cup chopped walnuts
    • 1/2 cup raisins
    • 1 teaspoon additional cinnamon
    • 1/2 cup caramel baking chips
    • 1/2 cup dried cranberries

    Remember that adding any of these will turn the recipe into more than a three-ingredient cake.

    Easy Variations

    3-Ingredient Apple Cinnamon Cake

    Use spice cake mix and a combination of tart and sweet apples for plenty of warm cinnamon-apple flavor.

    Apple Pecan Cake

    Fold 1/2 cup chopped pecans into the batter.

    Sprinkle a few additional pecans over the top before baking.

    Apple Walnut Cake

    Add 1/2 cup chopped walnuts for extra texture and nutty flavor.

    Caramel Apple Cake

    Drizzle caramel sauce over individual slices immediately before serving.

    For an extra-indulgent dessert, add vanilla ice cream and warm caramel sauce.

    Apple Cake Muffins

    Divide the batter among greased or lined muffin cups.

    Bake at 350°F for approximately 18–24 minutes, or until the centers are set and a toothpick inserted into a cakey portion comes out clean.

    Apple Cake With Powdered Sugar

    Let the cake cool completely, then lightly dust the top with powdered sugar immediately before serving.

    It’s one of the easiest ways to give this simple cake a prettier presentation.

    What to Serve With 3-Ingredient Apple Cake

    This cake is moist and flavorful enough to enjoy on its own, but it’s even better with:

    • Vanilla ice cream
    • Whipped cream
    • Caramel sauce
    • Powdered sugar
    • Chopped toasted pecans
    • Hot coffee
    • Hot tea
    • Cold milk

    For a cozy fall dessert, serve the cake slightly warm with vanilla ice cream and a drizzle of caramel sauce.

    Make-Ahead Instructions

    This easy apple cake can be baked a day before serving.

    Let it cool completely, then cover the baking dish tightly or transfer individual slices to an airtight container.

    If you’re planning to add powdered sugar, whipped cream, or caramel sauce, wait until shortly before serving.

    Storage

    Allow the cake to cool completely before storing.

    Transfer leftovers to an airtight container and refrigerate for up to 5 days.

    You can enjoy the cake cold, bring it to room temperature, or gently warm individual slices before serving.

    Can You Freeze 3-Ingredient Apple Cake?

    Yes.

    Allow the cake to cool completely.

    Cut it into individual portions and wrap each piece tightly in plastic wrap. Place the wrapped slices in a freezer-safe container or freezer bag.

    Freeze for up to 3 months.

    Thaw overnight in the refrigerator or at room temperature for a few hours.

    For best results, freeze the cake without whipped cream, ice cream, caramel sauce, or other toppings.

    How to Reheat

    Place an individual slice on a microwave-safe plate and microwave for approximately 10–20 seconds, or until gently warmed.

    Avoid overheating because this can make the cake rubbery or dry.

    For dessert, serve the warm cake immediately with a scoop of vanilla ice cream.

    Frequently Asked Questions

    Can you really make apple cake with only three ingredients?

    Yes. Boxed cake mix already contains flour, sugar, leavening, and flavorings. Eggs provide structure, while fresh apples add moisture, sweetness, and apple flavor.

    Do I prepare the cake mix according to the package?

    No. Use the dry cake mix straight from the box. Don’t add the oil, water, or other ingredients listed in the standard package directions.

    Why is the batter so thick?

    That’s normal. The recipe doesn’t contain the additional liquid normally used with boxed cake mix. As the apples are folded into the mixture and later bake, they release moisture into the cake.

    Do I need to peel the apples?

    Peeling is recommended for the softest cake texture. Apple peels can remain somewhat chewy after baking, depending on the variety.

    Can I use applesauce instead of fresh apples?

    Not as a direct substitution in this specific recipe. Applesauce contains a different amount of moisture and won’t provide the same structure or chunks of fruit.

    Can I use yellow cake mix?

    Yes. Yellow cake mix works, although the cake won’t have the same warm spice flavor. Adding cinnamon is an easy option if you don’t need to keep the recipe strictly three ingredients.

    Can I make this into muffins?

    Yes. Divide the batter among muffin cups and bake at 350°F for approximately 18–24 minutes, checking for doneness before removing them from the oven.

    How do I know when apple cake is done?

    The top should look set and lightly browned. A toothpick inserted into the cake portion near the center should come out clean or with a few moist crumbs. Avoid testing directly through an apple piece.

    Nutrition Information

    Approximate nutrition per serving, based on 12 servings:

    • Calories: 210
    • Protein: 4g
    • Carbohydrates: 42g
    • Fat: 4g
    • Fiber: 2g
    • Sugar: 25g
    • Sodium: 330mg

    Nutrition information is an estimate and can vary depending on the cake mix brand, apple variety, exact amount of fruit, and serving size.

    Final Thoughts

    3-Ingredient Apple Cake is an easy way to turn fresh apples and a box of cake mix into a warm, comforting homemade dessert. The apples provide natural moisture and sweetness, while spice cake mix delivers cozy cinnamon flavor without requiring a long list of ingredients.

    Serve it plain for a simple snack or dress it up with powdered sugar, whipped cream, vanilla ice cream, and caramel sauce. With only three ingredients and about 10 minutes of prep, this is an easy apple dessert worth keeping in your recipe collection.
     

  • 3-Ingredient Chocolate Cake

    3-Ingredient Chocolate Cake

    3-Ingredient Chocolate Cake

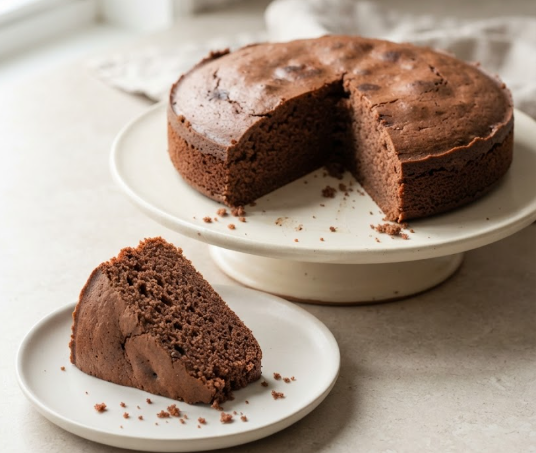
    This 3-Ingredient Chocolate Cake is rich, moist, and incredibly easy to make. With just chocolate cake mix, eggs, and Greek yogurt, you can have a soft, chocolatey homemade-style cake in the oven in only a few minutes.

    There’s no need to measure flour, cocoa powder, sugar, oil, or butter. The Greek yogurt adds moisture and richness, while the eggs give the cake structure and the boxed mix keeps preparation quick and reliable. It’s the perfect easy dessert for busy weeknights, last-minute gatherings, birthdays, or whenever a chocolate craving hits.

    Recipe Details

    Prep Time: 5 minutes
    Bake Time: 28–35 minutes
    Cooling Time: 30 minutes
    Total Time: About 1 hour 10 minutes
    Servings: 12
    Course: Dessert
    Cuisine: American
    Method: Baking
    Difficulty: Easy

    Ingredients

    • 1 box (15.25 ounces) chocolate cake mix
    • 1 cup plain Greek yogurt
    • 3 large eggs

    That’s it! You only need three ingredients for the basic chocolate cake.

    Instructions

    1. Preheat the Oven

    Preheat your oven to 350°F.

    Grease a 9×13-inch baking pan with nonstick cooking spray.

    For easier removal, you can also line the pan with parchment paper and lightly grease the parchment.

    2. Combine the Eggs and Greek Yogurt

    Add the eggs and Greek yogurt to a large mixing bowl.

    Whisk until smooth and thoroughly combined.

    Using room-temperature eggs can make the ingredients easier to mix.

    3. Add the Chocolate Cake Mix

    Add the dry chocolate cake mix directly to the bowl.

    Don’t prepare the cake mix according to the directions on the box. You won’t need the water or oil listed there.

    4. Mix the Batter

    Use an electric mixer on low speed to combine the ingredients.

    Once the dry mix is mostly incorporated, increase to medium speed and mix just until the batter is smooth.

    Scrape the sides and bottom of the bowl with a rubber spatula as needed.

    Avoid excessive mixing.

    The batter may be thicker than traditional boxed cake batter. That’s normal.

    5. Fill the Pan

    Spread the chocolate cake batter evenly into the prepared 9×13-inch pan.

    Use a spatula to smooth the surface.

    6. Bake

    Bake at 350°F for approximately 28–35 minutes, or until a toothpick inserted into the center comes out clean or with a few moist crumbs.

    Begin checking the cake toward the lower end of the baking time because ovens and baking pans can vary.

    Avoid overbaking, as this can make the cake dry.

    7. Cool

    Remove the cake from the oven and place the pan on a wire rack.

    Allow the cake to cool completely before slicing or adding any optional toppings.

    Serve as-is or dress it up with powdered sugar, berries, whipped cream, or chocolate frosting.

    Tips for the Best 3-Ingredient Chocolate Cake

    Use the cake mix dry. Don’t follow the ingredient instructions printed on the box. The cake mix goes directly into your mixing bowl.

    Use plain Greek yogurt. Full-fat or 2% Greek yogurt will generally provide a richer texture than nonfat yogurt.

    Don’t overmix. Mix only until the batter is smooth and the dry cake mix has been incorporated.

    Don’t worry about thick batter. Because this recipe doesn’t use the water and oil normally added to boxed cake mix, the batter may be noticeably thicker.

    Don’t overbake. Chocolate cake can dry out quickly. Check it early and remove it once a toothpick shows no wet batter.

    Let it cool before cutting. The cake’s texture will set as it cools, making it easier to slice cleanly.

    What Chocolate Cake Mix Should I Use?

    A standard 15.25-ounce box of chocolate cake mix works well for this recipe.

    Depending on the flavor you prefer, you can try:

    • Devil’s food cake mix
    • Dark chocolate cake mix
    • Milk chocolate cake mix
    • Chocolate fudge cake mix

    Devil’s food or chocolate fudge cake mix will give the finished cake an especially rich chocolate flavor.

    Because formulas vary between brands, the exact texture and nutrition information may differ slightly.

    Easy Variations

    3-Ingredient Chocolate Chip Cake

    Fold 3/4 cup semisweet chocolate chips into the finished batter before baking.

    Technically, this turns the recipe into a four-ingredient cake, but it’s an easy way to add even more chocolate flavor.

    Chocolate Peanut Butter Cake

    Serve individual slices with a drizzle of warmed peanut butter or spread a thin layer of peanut butter frosting over the cooled cake.

    Chocolate Strawberry Cake

    Top the cooled cake with fresh sliced strawberries and whipped cream.

    Chocolate Raspberry Cake

    Serve with fresh raspberries and a light dusting of powdered sugar.

    Extra-Chocolate Cake

    Use chocolate fudge cake mix and add chocolate frosting after the cake has completely cooled.

    Birthday Chocolate Cake

    Spread your favorite chocolate or vanilla frosting over the cooled cake and finish with colorful sprinkles.

    Optional Toppings

    The basic cake is delicious on its own, but toppings can easily turn it into a special-occasion dessert.

    Try:

    • Powdered sugar
    • Chocolate frosting
    • Whipped cream
    • Fresh strawberries
    • Fresh raspberries
    • Chocolate chips
    • Chocolate ganache
    • Vanilla ice cream
    • Chocolate ice cream
    • Caramel sauce
    • Chopped toasted nuts

    For a simple presentation, dust the completely cooled cake with powdered sugar immediately before serving.

    Can I Make Chocolate Cupcakes?

    Yes.

    Line a standard muffin pan with cupcake liners.

    Divide the batter among the cups, filling each approximately two-thirds full.

    Bake at 350°F for about 18–22 minutes, or until a toothpick inserted into the center comes out clean or with a few moist crumbs.

    Cool completely before adding frosting or other toppings.

    Baking time can vary depending on the size of your cupcakes and your oven.

    Can I Make a Layer Cake?

    Yes. You can divide the batter between two greased and parchment-lined 8-inch round cake pans.

    Because the batter will be divided into thinner layers, begin checking for doneness earlier than you would for a 9×13-inch cake.

    Let the layers cool completely before removing them from the pans and adding frosting.

    Keep in mind that this three-ingredient cake can have a slightly different structure from a traditional layer cake, so handle the cooled layers gently.

    What to Serve With Chocolate Cake

    This easy cake pairs well with:

    • Vanilla ice cream
    • Fresh strawberries
    • Fresh raspberries
    • Whipped cream
    • Hot coffee
    • Cold milk
    • Chocolate sauce
    • Caramel sauce
    • Peanut butter
    • Fresh fruit

    For an easy dessert, slightly warm an individual slice and serve it with a scoop of vanilla ice cream.

    Make-Ahead Instructions

    You can bake this chocolate cake one day before serving.

    Allow it to cool completely, then cover the pan tightly or transfer the cake to an airtight container.

    If you’re planning to frost it, wait until the cake is completely cool.

    Storage

    Store the completely cooled cake in an airtight container.

    Because this cake contains Greek yogurt, for longer storage it’s best to keep it refrigerated.

    Refrigerate for up to 5 days.

    For a softer texture, allow individual slices to sit at room temperature briefly before serving.

    If you add a frosting or topping that requires refrigeration, keep the finished cake refrigerated.

    Can You Freeze 3-Ingredient Chocolate Cake?

    Yes.

    Allow the cake to cool completely before freezing.

    Wrap individual slices tightly in plastic wrap and place them in a freezer-safe container or freezer bag.

    Freeze for up to 3 months.

    Thaw overnight in the refrigerator or for a few hours at room temperature.

    For best results, freeze the cake before adding whipped cream, fresh fruit, or other perishable toppings.

    How to Reheat

    If you prefer warm chocolate cake, microwave an individual unfrosted slice for approximately 10–15 seconds.

    Be careful not to overheat it, which can make the cake dry.

    Serve the warm cake with vanilla ice cream for an especially easy dessert.

    Frequently Asked Questions

    Can you really make chocolate cake with only three ingredients?

    Yes. Boxed chocolate cake mix already contains ingredients such as flour, sugar, cocoa, and leavening. Eggs provide structure, while Greek yogurt adds moisture and richness.

    Do I prepare the cake mix according to the box?

    No. Add the dry cake mix directly from the package. Don’t add the oil, water, or other ingredients listed in the standard package directions.

    What kind of Greek yogurt should I use?

    Plain Greek yogurt works best. Full-fat or 2% Greek yogurt generally creates a richer cake, although other varieties may also work.

    Can I use flavored Greek yogurt?

    You can experiment with vanilla Greek yogurt, but it will add sweetness and vanilla flavor to the cake. Plain yogurt gives you more control over the final flavor.

    Why is my batter so thick?

    That’s normal for this simplified recipe. The batter contains less added liquid than cake prepared according to typical boxed-mix instructions.

    Why did my cake turn out dry?

    It was likely baked too long. Begin checking the cake early and remove it once a toothpick inserted in the center no longer shows wet batter.

    Can I add chocolate chips?

    Absolutely. Fold chocolate chips into the batter before baking, keeping in mind that they make this a four-ingredient recipe.

    Can I make cupcakes with this recipe?

    Yes. Divide the batter among cupcake liners and bake at 350°F for approximately 18–22 minutes, checking them early for doneness.

    Nutrition Information

    Approximate nutrition per serving, based on 12 servings:

    • Calories: 220
    • Protein: 6g
    • Carbohydrates: 37g
    • Fat: 6g
    • Fiber: 2g
    • Sugar: 21g
    • Sodium: 350mg

    Nutrition information is an estimate and can vary significantly depending on the cake mix and Greek yogurt brands used, as well as serving size and optional toppings.

    Final Thoughts

    3-Ingredient Chocolate Cake is proof that a satisfying chocolate dessert doesn’t need a complicated ingredient list. Chocolate cake mix provides the classic cocoa flavor, Greek yogurt keeps the cake moist and tender, and eggs give it enough structure to slice and serve.

    Enjoy it plain for an easy everyday treat, dust it with powdered sugar, or dress it up with chocolate frosting, berries, and whipped cream for a celebration. With only three ingredients and a few minutes of prep, it’s a convenient chocolate cake recipe to keep on hand whenever dessert needs to be simple.

  • Moist Banana Cake with Brown Butter Cream Cheese Frosting

    Moist Banana Cake with Brown Butter Cream Cheese Frosting

    Moist Banana Cake with Brown Butter Cream Cheese Frosting

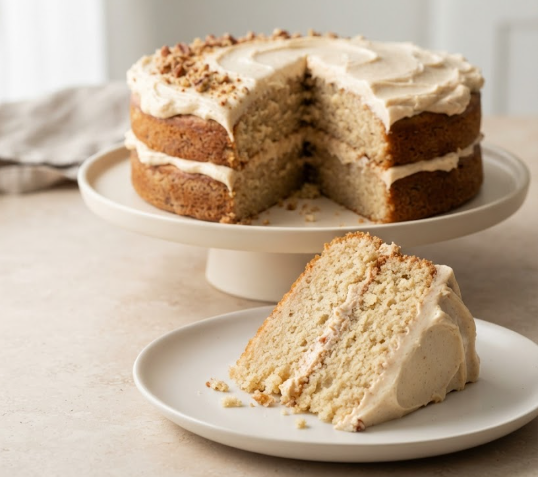
    This Moist Banana Cake with Brown Butter Cream Cheese Frosting is incredibly soft, tender, and packed with sweet banana flavor. Made with ripe bananas, brown sugar, buttermilk, and warm vanilla, the cake stays wonderfully moist while still feeling light enough for a generous layer of frosting.

    The real star is the brown butter cream cheese frosting. Browning the butter gives it a rich, toasted, slightly nutty flavor that pairs beautifully with sweet bananas and tangy cream cheese. It’s an irresistible upgrade to classic banana cake and a perfect dessert for birthdays, potlucks, holidays, family gatherings, or simply using up those overripe bananas on your counter.

    Recipe Details

    Prep Time: 25 minutes
    Bake Time: 35–40 minutes
    Cooling & Frosting Time: 1 hour
    Total Time: About 2 hours
    Servings: 12
    Course: Dessert
    Cuisine: American
    Method: Baking

    Ingredients

    For the Moist Banana Cake

    • 2 cups all-purpose flour
    • 1 teaspoon baking soda
    • 1/2 teaspoon baking powder
    • 1/2 teaspoon kosher salt
    • 1/2 teaspoon ground cinnamon
    • 1/2 cup unsalted butter, softened
    • 3/4 cup packed light brown sugar
    • 1/2 cup granulated sugar
    • 2 large eggs, room temperature
    • 1 1/2 cups mashed very ripe bananas, about 3–4 large bananas
    • 1/2 cup buttermilk, room temperature
    • 2 teaspoons pure vanilla extract

    For the Brown Butter Cream Cheese Frosting

    • 3/4 cup unsalted butter
    • 8 ounces full-fat block cream cheese, softened
    • 3 1/2 cups powdered sugar
    • 2 teaspoons pure vanilla extract
    • 1/4 teaspoon kosher salt

    Optional Toppings

    • Chopped toasted pecans
    • Chopped walnuts
    • Banana chips
    • Ground cinnamon
    • Caramel drizzle

    Instructions

    1. Prepare the Oven and Pan

    Preheat the oven to 350°F.

    Grease a 9×13-inch baking pan and line it with parchment paper, leaving some parchment extending over the sides for easy removal.

    Lightly grease the parchment.

    2. Combine the Dry Ingredients

    In a medium bowl, whisk together the flour, baking soda, baking powder, salt, and cinnamon.

    Set aside while you prepare the wet ingredients.

    3. Cream the Butter and Sugars

    Place the softened butter, brown sugar, and granulated sugar in a large mixing bowl.

    Using an electric mixer, beat on medium-high speed for approximately 2–3 minutes, until lighter and creamy.

    Scrape down the sides and bottom of the bowl as needed.

    4. Add the Eggs

    Add the eggs one at a time, beating well after each addition.

    Mix in the vanilla extract.

    5. Add the Bananas

    Add the mashed ripe bananas and mix until combined.

    The batter may look slightly separated at this stage, which is normal.

    6. Alternate the Dry Ingredients and Buttermilk

    With the mixer on low speed, add about one-third of the flour mixture.

    Add half of the buttermilk, followed by another third of the flour mixture.

    Mix in the remaining buttermilk, then finish with the remaining dry ingredients.

    Mix only until combined. Avoid overmixing, which can make the cake dense instead of soft and tender.

    7. Fill the Pan

    Spread the banana cake batter evenly into the prepared 9×13-inch pan.

    Smooth the top with a spatula.

    8. Bake

    Bake at 350°F for 35–40 minutes, or until a toothpick inserted into the center comes out clean or with a few moist crumbs.

    Begin checking the cake around 33–35 minutes because ovens can vary.

    Avoid overbaking—the cake will stay much softer and moister when removed as soon as it’s done.

    9. Cool Completely

    Place the pan on a wire rack and allow the cake to cool completely before frosting.

    Don’t add cream cheese frosting to a warm cake, as it can melt and become runny.

    How to Make Brown Butter Cream Cheese Frosting

    1. Brown the Butter

    Place the butter in a light-colored saucepan or skillet over medium heat.

    Let it melt completely.

    Continue cooking, stirring or swirling the pan frequently. The butter will foam and then begin developing golden-brown bits on the bottom.

    Watch carefully as it changes from golden to amber and develops a toasted, nutty aroma.

    Once browned, immediately remove the pan from the heat so the milk solids don’t burn.

    2. Cool the Brown Butter

    Pour the brown butter, including the flavorful browned bits, into a heat-safe bowl.

    Allow it to cool until it begins to solidify but is still soft enough to beat.

    You can refrigerate it briefly to speed up the process, but check it frequently so it doesn’t become completely hard.

    3. Beat the Brown Butter

    Transfer the cooled brown butter to a mixing bowl.

    Beat with an electric mixer until smooth and creamy.

    4. Add the Cream Cheese

    Add the softened block cream cheese.

    Beat briefly until smooth and combined.

    Avoid excessive mixing once the cream cheese is added, as overbeating can make cream cheese frosting softer.

    5. Add the Powdered Sugar

    With the mixer on low speed, gradually add the powdered sugar.

    Continue mixing until incorporated.

    6. Add Vanilla and Salt

    Add the vanilla extract and salt.

    Beat briefly until the frosting is smooth, creamy, and spreadable.

    If the frosting feels too soft, refrigerate it for approximately 15–30 minutes before using.

    Frost the Banana Cake

    Once the banana cake is completely cool, spread the brown butter cream cheese frosting evenly over the top.

    Use an offset spatula or the back of a spoon to create decorative swirls.

    For extra texture, sprinkle the top with toasted pecans or walnuts.

    You can also finish the cake with banana chips, a light dusting of cinnamon, or a drizzle of caramel sauce.

    Slice into squares and serve.

    Tips for the Best Moist Banana Cake

    Use very ripe bananas. Bananas covered with plenty of brown or black spots are sweeter, softer, and more flavorful than yellow bananas.

    Measure the mashed banana. Banana sizes vary considerably. Measuring approximately 1 1/2 cups gives more consistent results than relying only on the number of bananas.

    Measure flour correctly. Spoon the flour into the measuring cup and level it with a knife. Scooping directly from the flour container can pack too much flour into the cup and make the cake dry.

    Use room-temperature ingredients. Butter, eggs, and buttermilk combine more evenly when they’re close to room temperature.

    Don’t overmix. Once you begin adding the flour, mix only until everything is incorporated.

    Don’t overbake. Overbaking can quickly turn a wonderfully moist banana cake dry.

    Watch the brown butter carefully. Once the milk solids begin browning, butter can go from perfectly toasted to burned very quickly.

    Cool the brown butter before making the frosting. Warm butter can melt the cream cheese and produce runny frosting.

    How Ripe Should Bananas Be for Banana Cake?

    The best bananas for baking are much riper than the bananas most people prefer for snacking.

    Look for bananas with heavily spotted brown skins or skins that have become mostly brown or black.

    As bananas ripen, their starches convert into sugars, giving baked goods more natural sweetness and stronger banana flavor.

    Avoid using firm green or barely ripe bananas if possible.

    How to Quickly Ripen Bananas for Baking

    If your bananas aren’t quite ripe enough, place the unpeeled bananas on a baking sheet and bake them at 300°F until the skins become dark and the fruit inside softens, usually around 15–30 minutes depending on ripeness.

    Let them cool before peeling and mashing.

    This method softens and sweetens the bananas, although naturally overripe bananas generally provide the best flavor.

    Why Brown Butter Makes the Frosting Better

    Regular butter is delicious, but browning it adds another layer of flavor.

    As butter cooks, its milk solids toast and develop rich caramelized, nutty notes. Those flavors complement banana cake especially well.

    Combining brown butter with tangy cream cheese creates a frosting that’s rich without tasting one-dimensional or overly sweet.

    Be sure to scrape all the little browned milk solids from the pan into your mixing bowl—that’s where much of the toasted flavor comes from.

    Easy Variations

    Banana Cake With Walnuts

    Fold 3/4 cup chopped walnuts into the batter before baking.

    Sprinkle additional toasted walnuts over the frosting.

    Banana Pecan Cake

    Add 3/4 cup chopped pecans to the cake batter and decorate the finished cake with toasted pecans.

    Banana Chocolate Chip Cake

    Fold 1 cup semisweet chocolate chips into the batter before transferring it to the baking pan.

    Banana Caramel Cake

    Drizzle caramel sauce over the cream cheese frosting immediately before serving.

    A small sprinkle of flaky salt can provide a delicious sweet-and-salty finish.

    Banana Cupcakes

    Divide the batter among lined muffin cups, filling each approximately two-thirds full.

    Bake at 350°F for about 18–22 minutes, or until a toothpick inserted into the center comes out clean or with a few moist crumbs.

    Cool completely before adding the brown butter cream cheese frosting.

    Can I Make This as a Layer Cake?

    Yes.

    Divide the batter evenly between two greased and parchment-lined 9-inch round cake pans.

    Because layer cakes may bake faster than a 9×13-inch cake, begin checking them around 25 minutes.

    They’re done when a toothpick inserted into the center comes out clean or with a few moist crumbs.

    Cool the layers completely before assembling them with the brown butter cream cheese frosting.

    What to Serve With Banana Cake

    This cake is delicious on its own, but you can make individual servings extra special with:

    • Fresh banana slices
    • Vanilla ice cream
    • Caramel sauce
    • Toasted pecans
    • Toasted walnuts
    • Fresh strawberries
    • Whipped cream
    • Hot coffee
    • Cold milk

    If decorating with fresh banana slices, add them immediately before serving because cut bananas will brown over time.

    Make-Ahead Instructions

    The banana cake can be baked a day ahead.

    Once completely cooled, cover the unfrosted cake tightly and keep it at room temperature overnight.

    You can also prepare the brown butter ahead of time and refrigerate it. Allow it to soften before preparing the frosting.

    Once frosted with cream cheese frosting, keep the cake refrigerated.

    Storage

    Because this banana cake is topped with cream cheese frosting, store leftovers covered in the refrigerator.

    The cake will keep well for up to 5 days.

    For the softest texture and fullest flavor, allow individual slices to sit at room temperature for approximately 20–30 minutes before serving.

    Avoid leaving cream cheese-frosted cake at room temperature for extended periods.

    Can You Freeze Banana Cake?

    Yes. Banana cake freezes very well.

    Unfrosted Cake

    Allow the cake to cool completely.

    Wrap it tightly in plastic wrap followed by aluminum foil and freeze for up to 3 months.

    Thaw overnight in the refrigerator before frosting.

    Frosted Cake

    You can also freeze individual frosted slices in airtight freezer-safe containers.

    Thaw them overnight in the refrigerator before serving.

    Frequently Asked Questions

    What makes banana cake moist?

    Ripe bananas naturally contribute moisture, while butter, brown sugar, eggs, and buttermilk help create a soft and tender cake.

    Can I use frozen bananas?

    Yes. Thaw frozen ripe bananas completely and drain off excessive watery liquid before mashing and measuring them.

    Can I use regular milk instead of buttermilk?

    Buttermilk is recommended for the best flavor and texture. If necessary, add 1 1/2 teaspoons of lemon juice or white vinegar to a measuring cup, then add enough milk to reach 1/2 cup. Let it stand for 5–10 minutes before using.

    What’s the difference between banana cake and banana bread?

    Banana cake is generally lighter, softer, and sweeter, while banana bread tends to have a denser, sturdier quick-bread texture. Banana cake is also commonly finished with frosting.

    Why did my banana cake turn out dense?

    Overmixing the batter, adding too much flour, or using an excessive amount of banana can make the cake heavier than intended.

    Why is my cream cheese frosting runny?

    The brown butter may have been too warm, the cream cheese may have been overly soft, or the frosting may have been beaten for too long. Refrigerate the frosting for 15–30 minutes to help it firm up.

    Can I make this recipe without nuts?

    Absolutely. Nuts are completely optional and can simply be omitted without making other changes to the recipe.

    Nutrition Information

    Approximate nutrition per serving, based on 12 servings:

    • Calories: 610
    • Protein: 6g
    • Carbohydrates: 83g
    • Fat: 30g
    • Fiber: 2g
    • Sugar: 60g
    • Sodium: 350mg

    Nutrition information is an estimate and will vary depending on the exact ingredients, brands, frosting amount, optional toppings, and serving sizes used.

    Final Thoughts

    Moist Banana Cake with Brown Butter Cream Cheese Frosting takes classic banana cake to another level. Sweet ripe bananas keep every bite soft and flavorful, while brown butter adds toasted, nutty depth to the tangy cream cheese frosting.

    It’s an easy dessert for using overripe bananas, but the finished cake is special enough for birthdays, holidays, potlucks, and family celebrations. Add toasted pecans for crunch, a caramel drizzle for extra decadence, or simply serve it with those beautiful swirls of brown butter cream cheese frosting.

  • Southern Red Velvet Cake with Cream Cheese Frosting

    Southern Red Velvet Cake with Cream Cheese Frosting

    Southern Red Velvet Cake with Cream Cheese Frosting

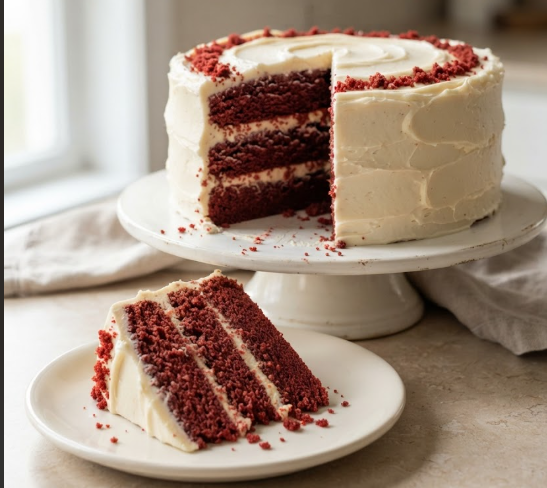
    Southern Red Velvet Cake with Cream Cheese Frosting is a classic celebration cake with soft, velvety layers, a subtle cocoa flavor, and a rich, tangy cream cheese frosting. With its striking red color and tender crumb, this beautiful layer cake is perfect for birthdays, holidays, Valentine’s Day, Christmas, family gatherings, and special occasions.

    What makes a great red velvet cake different from an ordinary chocolate cake is the balance of flavors. Cocoa adds a gentle chocolate note, buttermilk and vinegar provide the signature tang, and oil keeps the layers exceptionally moist. Finish it with homemade cream cheese frosting for a timeless Southern-inspired dessert that’s just as impressive as it is delicious.

    Recipe Details

    Prep Time: 30 minutes
    Bake Time: 28–32 minutes
    Cooling & Decorating Time: 1 hour
    Total Time: About 2 hours
    Servings: 12
    Course: Dessert
    Cuisine: Southern American
    Method: Baking

    Ingredients

    For the Red Velvet Cake

    • 2 1/2 cups all-purpose flour
    • 2 tablespoons unsweetened natural cocoa powder
    • 1 teaspoon baking soda
    • 1 teaspoon kosher salt
    • 1 3/4 cups granulated sugar
    • 1 cup vegetable oil
    • 2 large eggs, room temperature
    • 1 cup buttermilk, room temperature
    • 2 teaspoons pure vanilla extract
    • 1 teaspoon distilled white vinegar
    • 1 to 2 tablespoons red gel food coloring, or enough to reach your desired color

    For the Cream Cheese Frosting

    • 16 ounces full-fat block cream cheese, softened
    • 1 cup unsalted butter, softened
    • 4 1/2 cups powdered sugar
    • 2 teaspoons pure vanilla extract
    • Pinch of kosher salt

    Optional Decorations

    • Red velvet cake crumbs
    • Fresh strawberries or raspberries
    • White chocolate curls
    • Chopped pecans

    Instructions

    1. Prepare the Oven and Cake Pans

    Preheat the oven to 350°F.

    Grease two 9-inch round cake pans and line the bottoms with parchment paper. Lightly grease the parchment as well.

    This extra step makes it much easier to remove the delicate cake layers without breaking them.

    2. Combine the Dry Ingredients

    In a medium bowl, whisk together the flour, cocoa powder, baking soda, and salt.

    Set aside.

    If your cocoa powder has noticeable lumps, sift it before mixing.

    3. Mix the Sugar and Oil

    In a large mixing bowl, combine the granulated sugar and vegetable oil.

    Using an electric mixer, beat on medium speed until well combined.

    4. Add the Eggs

    Add the eggs one at a time, mixing well after each addition.

    Scrape down the sides and bottom of the bowl as necessary to ensure everything is evenly incorporated.

    5. Add the Buttermilk and Vanilla

    Add the buttermilk and vanilla extract and mix on low speed until combined.

    Add the red food coloring and mix until the batter has an even red color.

    The exact amount of coloring needed will depend on the type and concentration of food coloring you use.

    6. Add the Dry Ingredients

    Gradually add the dry ingredients to the wet ingredients.

    Mix on low speed just until combined.

    Avoid overmixing the batter, as excessive mixing can make the finished cake denser and less tender.

    7. Add the Vinegar

    Stir in the white vinegar just until incorporated.

    The vinegar works with the baking soda and buttermilk while also contributing to red velvet cake’s characteristic subtle tang.

    8. Divide the Batter

    Divide the cake batter evenly between the two prepared pans.

    For layers that are as even as possible, weigh the filled pans with a kitchen scale.

    Gently tap the pans on the counter to release any large air bubbles.

    9. Bake

    Bake at 350°F for 28–32 minutes, or until a toothpick inserted into the center comes out clean or with a few moist crumbs attached.

    Avoid overbaking. The cake should be fully baked but still soft and moist.

    10. Cool the Cakes

    Let the cakes cool in their pans for about 10–15 minutes.

    Carefully run a thin knife around the edges, then turn the cakes out onto wire racks.

    Remove the parchment and let the cake layers cool completely before adding the frosting.

    How to Make Cream Cheese Frosting

    1. Beat the Butter

    Place the softened butter in a large mixing bowl.

    Beat with an electric mixer on medium-high speed for about 2 minutes until smooth and creamy.

    2. Add the Cream Cheese

    Add the softened block cream cheese.

    Beat just until the butter and cream cheese are smooth and completely combined.

    Avoid excessive beating once the cream cheese is incorporated because cream cheese frosting can become too soft.

    3. Add the Powdered Sugar

    Reduce the mixer speed to low.

    Gradually add the powdered sugar, about 1 cup at a time, until incorporated.

    4. Add Vanilla and Salt

    Add the vanilla extract and a small pinch of salt.

    Beat briefly until the frosting is smooth, creamy, and spreadable.

    If the frosting becomes too soft to decorate with, refrigerate it for 15–30 minutes before assembling the cake.

    How to Assemble Red Velvet Cake

    Place one completely cooled cake layer on a cake stand or serving plate.

    Spread a generous layer of cream cheese frosting evenly over the top.

    Place the second cake layer on top and gently press it into position.

    Spread a thin layer of frosting over the top and sides to create a crumb coat.

    Refrigerate the cake for approximately 20 minutes to set the crumb coat.

    Spread the remaining cream cheese frosting over the top and sides.

    For a classic homemade appearance, create soft swirls in the frosting with an offset spatula.

    Decorate with red velvet crumbs, berries, white chocolate curls, or chopped pecans if desired.

    Refrigerate the cake until you’re ready to serve.

    Tips for the Best Southern Red Velvet Cake

    Use buttermilk. Its acidity and subtle tang are important parts of traditional red velvet flavor and help create a tender crumb.

    Use natural cocoa powder. Red velvet isn’t intended to taste like a deeply chocolatey layer cake. A small amount of natural cocoa gives it the right subtle cocoa flavor.

    Use room-temperature ingredients. Eggs and buttermilk combine more evenly when they aren’t refrigerator-cold.

    Measure flour carefully. Spoon the flour into your measuring cup and level the top rather than packing flour into the cup.

    Don’t overmix the batter. Mix only until the ingredients are incorporated for a softer cake.

    Don’t overbake. Overbaking is one of the easiest ways to turn a moist red velvet cake dry.

    Use block cream cheese. Full-fat cream cheese sold in blocks generally makes a more stable frosting than spreadable cream cheese sold in tubs.

    Cool the layers completely. Even slightly warm cake can soften cream cheese frosting and cause the layers to slide.

    What Does Red Velvet Cake Taste Like?

    Red velvet cake isn’t simply vanilla cake dyed red, and it isn’t quite chocolate cake either.

    Classic red velvet has a mild cocoa flavor balanced by vanilla and the tanginess of buttermilk and vinegar. The result is a unique flavor that’s slightly chocolatey, slightly tangy, and mildly sweet.

    Cream cheese frosting complements those flavors particularly well because its tanginess balances the sweetness of the cake.

    Why Is Red Velvet Cake Red?

    Modern red velvet cakes typically get their vibrant color from food coloring.

    Historically, cakes containing natural cocoa and acidic ingredients could develop reddish-brown tones, but they weren’t usually as bright as the red velvet cakes commonly served today.

    For a vibrant cake without adding too much liquid, concentrated gel food coloring works especially well.

    Easy Variations

    Three-Layer Red Velvet Cake

    Divide the batter between three 8-inch round cake pans instead of two 9-inch pans.

    Because the layers will be thinner, begin checking for doneness earlier.

    Red Velvet Cupcakes

    Divide the batter among lined cupcake pans, filling each liner about two-thirds full.

    Bake at 350°F for approximately 18–22 minutes, or until a toothpick inserted into the center comes out clean or with a few moist crumbs.

    Cool completely before topping with cream cheese frosting.

    Red Velvet Cake With Pecans

    Sprinkle finely chopped toasted pecans between the cake layers and over the top for extra texture and a Southern-inspired finish.

    Red Velvet Cake With Berries

    Decorate the finished cake with strawberries or raspberries. Their slightly tart flavor pairs beautifully with cream cheese frosting.

    How to Make Red Velvet Cake Ahead of Time

    You can bake the cake layers a day or two before assembling the cake.

    Let the layers cool completely, then wrap each one tightly in plastic wrap. Refrigerate until you’re ready to decorate.

    The cream cheese frosting can also be prepared ahead and refrigerated in an airtight container. Let it soften slightly before using and briefly stir or beat it until spreadable.

    Storage

    Because this cake is covered with cream cheese frosting, store it in the refrigerator.

    Place the cake in an airtight cake container or cover it carefully and refrigerate for up to 5 days.

    For the best texture and flavor, remove individual slices from the refrigerator about 20–30 minutes before serving.

    Don’t leave cream cheese-frosted cake sitting at room temperature for extended periods, particularly in a warm kitchen.

    Can You Freeze Red Velvet Cake?

    Yes.

    Freezing Unfrosted Cake Layers

    Cool the cake layers completely, then wrap each layer tightly in plastic wrap followed by aluminum foil.

    Freeze for up to 3 months.

    Thaw overnight in the refrigerator before decorating.

    Freezing Cake Slices

    Individual slices of frosted red velvet cake can also be frozen in airtight freezer-safe containers.

    Thaw them in the refrigerator before serving.

    Frequently Asked Questions

    Is red velvet cake just chocolate cake?

    No. Red velvet contains much less cocoa than a typical chocolate cake. Its distinctive flavor comes from the combination of a small amount of cocoa, vanilla, buttermilk, vinegar, and cream cheese frosting.

    Why do you put vinegar in red velvet cake?

    Vinegar provides acidity and works with baking soda while contributing to the subtle tang associated with red velvet cake.

    Can I make red velvet cake without buttermilk?

    If necessary, you can make a quick substitute by adding 1 tablespoon of white vinegar or lemon juice to a measuring cup and adding enough milk to reach 1 cup. Let it stand for about 5–10 minutes before using.

    For the most traditional flavor and texture, regular cultured buttermilk is recommended.

    Can I use liquid red food coloring?

    Yes. However, liquid coloring is generally less concentrated than gel coloring, so you may need more to achieve a deep red color.

    Why is my red velvet cake dry?

    Too much flour and overbaking are two common causes. Measure flour carefully and begin checking the cakes toward the lower end of the suggested baking time.

    Why is my cream cheese frosting runny?

    The butter or cream cheese may have been too warm, spreadable cream cheese may have been used, or the frosting may have been overmixed. Refrigerating it for 15–30 minutes can help firm it up.

    Can I use this recipe for cupcakes?

    Yes. Fill lined muffin cups about two-thirds full and bake at 350°F for approximately 18–22 minutes. Cool completely before frosting.

    Nutrition Information

    Approximate nutrition per serving, based on 12 servings:

    • Calories: 720
    • Protein: 7g
    • Carbohydrates: 92g
    • Fat: 38g
    • Fiber: 1g
    • Sugar: 68g
    • Sodium: 530mg

    Nutrition information is an estimate and will vary depending on the ingredients, brands, amount of frosting used, and serving sizes.

    Final Thoughts

    Southern Red Velvet Cake with Cream Cheese Frosting is a timeless dessert with everything you want in a celebration cake: moist and tender layers, subtle cocoa flavor, beautiful red color, and plenty of creamy, tangy frosting.

    Whether you’re making it for Christmas, Valentine’s Day, a birthday, or a family gathering, this classic red velvet layer cake makes an impressive centerpiece while using straightforward ingredients and techniques that home bakers can master.

  • Moist Chocolate Cake with Chocolate Fudge Frosting

    Moist Chocolate Cake with Chocolate Fudge Frosting

    Moist Chocolate Cake with Chocolate Fudge Frosting

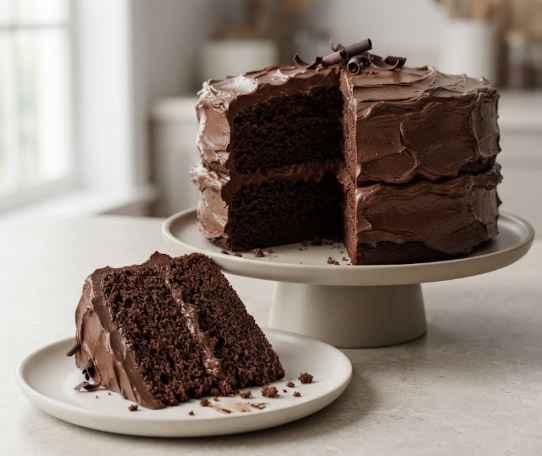
    This Moist Chocolate Cake with Chocolate Fudge Frosting is rich, deeply chocolatey, and incredibly tender with a soft crumb that stays moist for days. Two layers of homemade chocolate cake are covered with a thick, silky fudge frosting for the ultimate dessert for birthdays, holidays, celebrations, or whenever a serious chocolate craving hits.

    The cake uses simple pantry ingredients and hot coffee to intensify the cocoa flavor without making the finished cake taste like coffee. Paired with creamy chocolate fudge frosting, every slice is rich, decadent, and perfect with a cold glass of milk or a scoop of vanilla ice cream.

    Recipe Details

    Prep Time: 25 minutes
    Bake Time: 30–35 minutes
    Cooling & Frosting Time: 1 hour
    Total Time: About 2 hours
    Servings: 12
    Course: Dessert
    Cuisine: American
    Method: Baking

    Ingredients

    For the Chocolate Cake

    • 1 3/4 cups all-purpose flour
    • 2 cups granulated sugar
    • 3/4 cup unsweetened cocoa powder
    • 2 teaspoons baking soda
    • 1 teaspoon baking powder
    • 1 teaspoon kosher salt
    • 2 large eggs, room temperature
    • 1 cup buttermilk, room temperature
    • 1/2 cup vegetable oil
    • 2 teaspoons pure vanilla extract
    • 1 cup hot freshly brewed coffee

    For the Chocolate Fudge Frosting

    • 1 cup unsalted butter, softened
    • 3 1/2 cups powdered sugar
    • 3/4 cup unsweetened cocoa powder
    • 1/2 teaspoon kosher salt
    • 2 teaspoons pure vanilla extract
    • 1/2 cup heavy cream, plus more as needed
    • 4 ounces semisweet chocolate, melted and slightly cooled

    Instructions

    1. Prepare the Cake Pans

    Preheat the oven to 350°F.

    Grease two 9-inch round cake pans. Line the bottoms with parchment paper, then lightly grease the parchment.

    For extra insurance against sticking, dust the pans lightly with cocoa powder instead of flour.

    2. Combine the Dry Ingredients

    In a large mixing bowl, whisk together the flour, granulated sugar, cocoa powder, baking soda, baking powder, and salt.

    Whisk until evenly combined and no large cocoa lumps remain.

    3. Add the Wet Ingredients

    Add the eggs, buttermilk, vegetable oil, and vanilla extract to the dry ingredients.

    Using an electric mixer on medium speed, beat for approximately 2 minutes until everything is well combined.

    Scrape down the sides and bottom of the bowl as necessary.

    4. Add the Hot Coffee

    With the mixer on low speed, slowly pour in the hot coffee.

    Mix just until completely incorporated.

    Don’t worry if the batter looks much thinner than traditional cake batter. That’s expected and helps produce an exceptionally moist chocolate cake.

    5. Fill the Cake Pans

    Divide the batter evenly between the two prepared 9-inch cake pans.

    For evenly sized layers, use a kitchen scale to divide the batter by weight.

    Gently tap each pan on the counter a couple of times to release large air bubbles.

    6. Bake

    Bake at 350°F for 30–35 minutes, or until a toothpick inserted near the center comes out clean or with a few moist crumbs.

    Avoid overbaking, which is one of the most common reasons chocolate cake becomes dry.

    7. Cool Completely

    Place the cake pans on wire racks and allow the cakes to cool in their pans for approximately 10–15 minutes.

    Carefully run a thin knife around the edges and turn the cakes out onto the racks.

    Remove the parchment paper and allow the layers to cool completely before frosting.

    Never frost warm cake—the heat can melt the frosting and cause the layers to slide.

    How to Make Chocolate Fudge Frosting

    1. Melt the Chocolate

    Place the semisweet chocolate in a microwave-safe bowl.

    Microwave in 20-second intervals, stirring thoroughly after each interval, until smooth.

    Set aside and allow it to cool slightly. It should remain fluid but shouldn’t be hot when added to the frosting.

    2. Beat the Butter

    Place the softened butter in a large mixing bowl.

    Using an electric mixer, beat on medium-high speed for approximately 2–3 minutes until smooth and creamy.

    3. Add the Cocoa and Sugar

    Sift the powdered sugar and cocoa powder if they contain lumps.

    With the mixer on low speed, gradually add the powdered sugar, cocoa powder, and salt to the butter.

    Mix slowly at first to prevent the dry ingredients from flying out of the bowl.

    4. Add the Cream and Vanilla

    Add the vanilla and approximately 1/4 cup of the heavy cream.

    Beat until combined.

    5. Add the Melted Chocolate

    Pour in the slightly cooled melted chocolate.

    Beat on medium speed until the frosting is smooth, rich, and evenly chocolatey.

    Gradually add the remaining heavy cream until the frosting reaches a thick but easily spreadable consistency.

    Beat for another 1–2 minutes until creamy.

    Assemble the Chocolate Cake

    Place one completely cooled cake layer on a cake stand or serving plate.

    Spread approximately 1 cup of chocolate fudge frosting evenly over the top.

    Place the second cake layer on top.

    Spread a thin layer of frosting over the top and sides to create a crumb coat. Refrigerate the cake for approximately 15–20 minutes if you’d like a cleaner finish.

    Spread the remaining chocolate fudge frosting generously over the top and sides of the cake.

    Create swirls with an offset spatula or smooth the frosting for a more polished appearance.

    Slice and serve.

    Tips for the Moistest Chocolate Cake

    Measure the flour correctly. Spoon flour into the measuring cup and level it with a knife instead of packing it into the cup. Too much flour can produce a dry, dense cake.

    Don’t skip the buttermilk. Buttermilk adds moisture and helps create a tender crumb.

    Use oil instead of only butter. Vegetable oil stays liquid at room temperature and helps keep chocolate cake soft and moist.

    Use hot coffee. Coffee enhances chocolate flavor and helps bring out the richness of cocoa powder. The finished cake shouldn’t have a strong coffee flavor.

    Don’t overmix. Once the batter is combined, avoid excessive mixing.

    Don’t overbake. Start checking the cakes around the 30-minute mark.

    Cool before frosting. Completely cooled layers are much easier to frost and won’t melt the chocolate fudge frosting.

    Can I Make Chocolate Cake Without Coffee?

    Yes. Replace the hot coffee with 1 cup of hot water.

    The cake will still be moist and chocolatey, although coffee helps deepen the chocolate flavor.

    You can also dissolve 1 teaspoon of instant espresso powder in the hot water for a stronger chocolate flavor without brewing coffee.

    Easy Chocolate Cake Variations

    Chocolate Raspberry Cake

    Spread a thin layer of raspberry preserves between the cake and fudge frosting for a chocolate-and-berry combination.

    Chocolate Strawberry Cake

    Add sliced fresh strawberries between the layers or decorate the finished cake with strawberries.

    Chocolate Peanut Butter Cake

    Add a layer of creamy peanut butter frosting between the chocolate cake layers and use chocolate fudge frosting on the outside.

    Chocolate Birthday Cake

    Decorate the finished cake with colorful sprinkles, chocolate curls, or your favorite birthday decorations.

    Chocolate Cupcakes

    Divide the batter among lined cupcake pans, filling each liner about two-thirds full. Bake at 350°F for approximately 18–22 minutes, checking for doneness before removing them from the oven.

    Decorating Ideas

    Keep the cake simple with dramatic swirls of fudge frosting, or dress it up with:

    • Chocolate curls
    • Mini chocolate chips
    • Chocolate sprinkles
    • Fresh strawberries
    • Fresh raspberries
    • Chocolate-covered strawberries
    • Chopped toasted nuts
    • Chocolate ganache drizzle
    • Colorful birthday sprinkles
    • A light dusting of cocoa powder

    How to Make the Cake Ahead

    The chocolate cake layers can be baked ahead of time.

    Once completely cool, wrap each unfrosted layer tightly in plastic wrap and store at room temperature for about 1 day or refrigerate for up to 2 days.

    For longer storage, freeze the well-wrapped cake layers and thaw them before assembling.

    The frosting can also be prepared ahead and refrigerated in an airtight container. Allow it to soften at room temperature, then beat briefly before frosting the cake.

    Storage

    Store the frosted chocolate cake covered at room temperature for up to 2 days if your kitchen is reasonably cool.

    For longer storage, refrigerate the cake in an airtight cake container for up to 5 days.

    For the best flavor and texture, allow refrigerated cake slices to sit at room temperature for approximately 20–30 minutes before serving.

    Can You Freeze Chocolate Cake?

    Yes.

    For unfrosted cake layers, allow them to cool completely, then wrap them tightly in plastic wrap followed by aluminum foil. Freeze for up to 3 months.

    You can also freeze individual slices of frosted cake in airtight freezer-safe containers.

    Thaw overnight in the refrigerator, then bring closer to room temperature before serving.

    Frequently Asked Questions

    What makes this chocolate cake moist?

    The combination of buttermilk, vegetable oil, eggs, and hot coffee provides plenty of moisture. Properly measuring the flour and avoiding overbaking are equally important.

    Why add coffee to chocolate cake?

    Coffee intensifies cocoa’s chocolate flavor. It doesn’t necessarily make the cake taste like coffee, especially when paired with a rich chocolate frosting.

    What cocoa powder should I use?

    Regular unsweetened natural cocoa powder works well with the leavening in this recipe. For consistent results, use the type specified rather than automatically substituting Dutch-process cocoa.

    Why is my chocolate cake dry?

    Common causes include adding too much flour, baking for too long, or using an oven that runs hotter than its displayed temperature.

    Can I make this cake in a 9×13-inch pan?

    Yes. Pour the batter into a greased and lined 9×13-inch baking pan and bake at 350°F. Begin checking around 30–35 minutes and continue baking only until a toothpick comes out clean or with a few moist crumbs.

    Can I make the frosting without melted chocolate?

    Yes. You can leave out the melted semisweet chocolate for a simpler cocoa frosting. However, the melted chocolate gives this frosting its extra-rich, fudge-like flavor and texture.

    How do I prevent my cake from sticking?

    Grease the pans, line the bottoms with parchment paper, and lightly grease the parchment. This makes removing delicate chocolate cake layers much easier.

    Nutrition Information

    Approximate nutrition per serving, based on 12 servings:

    • Calories: 690
    • Protein: 7g
    • Carbohydrates: 96g
    • Fat: 34g
    • Fiber: 5g
    • Sugar: 72g
    • Sodium: 580mg

    Nutrition information is an estimate and will vary depending on the specific ingredients, brands, frosting amount, and serving sizes used.

    Final Thoughts

    This Moist Chocolate Cake with Chocolate Fudge Frosting is everything a homemade chocolate cake should be: soft, tender, deeply chocolatey, and generously covered in rich, creamy frosting.

    Whether you’re baking for a birthday, holiday, dinner party, or simply because you’re craving chocolate, this classic layer cake makes an impressive centerpiece without requiring complicated techniques. Serve it as-is or add berries, chocolate curls, or sprinkles to make it perfect for any occasion.

  • 5-Minute Cake Recipe | Easy Vanilla Chocolate Marble Cake

    5-Minute Cake Recipe | Easy Vanilla Chocolate Marble Cake

    5-Minute Cake Recipe | Easy Vanilla Chocolate Marble Cake

    Looking for a quick and delicious homemade cake? This 5-Minute Cake Recipe is one of the easiest cakes you’ll ever make! With simple pantry ingredients and just a few minutes of preparation, you can bake a soft, moist vanilla and chocolate marble cake that’s perfect for breakfast, afternoon tea, or dessert.

    Whether you’re a beginner or an experienced baker, this foolproof recipe will quickly become one of your favorites.


    Why You’ll Love This Recipe

    • Ready to prepare in just 5 minutes
    • Soft, moist, and fluffy texture
    • Beautiful vanilla and chocolate marble effect
    • Made with simple everyday ingredients
    • Perfect for tea time, coffee breaks, or family desserts

    Ingredients

    Cake Batter

    • 3 eggs
    • 150g (¾ cup) sugar
    • 100ml vegetable oil (⅓ cup + 1 tablespoon)
    • 150g (⅔ cup) plain yogurt
    • A pinch of salt
    • 1 teaspoon vanilla extract
    • 200g (1¼ cups) all-purpose flour
    • 1½ teaspoons baking powder (6g)

    Chocolate Layer

    • 1 tablespoon cocoa powder (10g)
    • 1 teaspoon instant coffee
    • About 2 tablespoons warm water

    Optional Topping

    • Chocolate sprinkles

    Equipment

    • 21 × 11 × 6 cm loaf pan
    • Mixing bowls
    • Whisk or electric mixer
    • Spatula

    Instructions

    Step 1: Prepare the Batter

    Preheat your oven to 170°C (338°F).

    In a large mixing bowl, whisk together the eggs and sugar until the mixture becomes light and slightly fluffy.

    Add the vegetable oil, plain yogurt, vanilla extract, and a pinch of salt. Mix until smooth.

    Sift in the flour and baking powder, then gently fold everything together until no lumps remain.

    Step 2: Make the Chocolate Batter

    Transfer about one-third of the batter to a separate bowl.

    Mix the cocoa powder, instant coffee, and warm water until smooth, then stir it into the smaller portion of batter.

    Step 3: Create the Marble Effect

    Grease the loaf pan.

    Pour half of the vanilla batter into the pan, followed by the chocolate batter. Finish with the remaining vanilla batter.

    Use a knife or skewer to gently swirl the batters together to create a beautiful marble pattern.

    Sprinkle chocolate sprinkles over the top if desired.

    Step 4: Bake

    Bake in the preheated oven at 170°C (338°F) for 35–40 minutes, or until a toothpick inserted into the center comes out clean.

    Allow the cake to cool in the pan for about 10 minutes before transferring it to a wire rack to cool completely.


    Serving Suggestions

    Serve warm or at room temperature with:

    • A cup of coffee
    • Hot tea
    • Fresh berries
    • Vanilla ice cream
    • Chocolate sauce

    Tips for the Best Cake

    • Use room-temperature eggs and yogurt for a lighter texture.
    • Avoid overmixing the batter to keep the cake soft.
    • Swirl gently to create a beautiful marble pattern without blending the colors completely.
    • Store leftovers in an airtight container for up to 3 days at room temperature.

    Frequently Asked Questions

    Can I use Greek yogurt?

    Yes. Greek yogurt makes the cake even richer and more moist.

    Can I skip the coffee?

    Absolutely. The coffee simply enhances the chocolate flavor and doesn’t make the cake taste like coffee.

    Can I freeze this cake?

    Yes. Wrap individual slices tightly and freeze for up to 2 months.


  • Double Chocolate Banana Bread

    Double Chocolate Banana Bread

    Double Chocolate Banana Bread

    Indulge in this rich and moist Double Chocolate Banana Bread, packed with ripe bananas, cocoa, and melty chocolate chips. Perfect for breakfast, dessert, or an afternoon treat, this easy-to-make loaf is guaranteed to satisfy every chocolate lover.

    Ingredients

    • 2 cups all-purpose flour
    • ½ cup unsweetened cocoa powder
    • 1 teaspoon baking soda
    • ½ teaspoon salt
    • ½ cup unsalted butter, melted (or vegetable oil)
    • ¾ cup brown sugar
    • ¼ cup granulated sugar
    • 2 large eggs
    • 1 teaspoon vanilla extract
    • 1 cup mashed ripe bananas (about 3 medium bananas)
    • ½ cup plain yogurt or sour cream
    • ¾ cup chocolate chips, plus extra for topping

    Instructions

    Step 1: Prepare the Oven and Pan

    Preheat your oven to 175°C (350°F). Line a loaf pan with parchment paper or lightly grease it to prevent sticking.

    Step 2: Mix the Dry Ingredients

    In a medium bowl, whisk together the flour, cocoa powder, baking soda, and salt. Set aside.

    Step 3: Prepare the Wet Ingredients

    In a large mixing bowl, combine the melted butter, brown sugar, and granulated sugar. Mix until smooth and well blended.

    Add the eggs and vanilla extract, then whisk until fully incorporated.

    Step 4: Add Bananas and Yogurt

    Stir in the mashed bananas and yogurt (or sour cream) until the mixture is smooth and evenly combined.

    Step 5: Combine the Batter

    Gradually add the dry ingredients to the wet ingredients, folding gently until just combined. Avoid overmixing, as this can make the bread dense.

    Fold in the chocolate chips, ensuring they are evenly distributed throughout the batter.

    Step 6: Bake

    Pour the batter into the prepared loaf pan and smooth the top. Sprinkle additional chocolate chips over the surface for an extra chocolatey finish.

    Bake for 50–60 minutes, or until a toothpick inserted into the center comes out with a few moist crumbs attached.

    Step 7: Cool and Serve

    Allow the banana bread to cool in the pan for 10–15 minutes before transferring it to a wire rack to cool completely.

    Slice and serve on its own, or enjoy with a cup of coffee, tea, or a glass of milk.

    Recipe Notes

    • Use overripe bananas for the best flavor and natural sweetness.
    • For added texture, stir in chopped walnuts or pecans.
    • Store in an airtight container at room temperature for up to 3 days or refrigerate for up to 1 week.
    • This banana bread freezes well for up to 3 months.

    Why You’ll Love This Recipe

    ✔ Rich chocolate flavor
    ✔ Moist and tender texture
    ✔ Easy, one-bowl preparation
    ✔ Perfect way to use ripe bananas
    ✔ Great for breakfast, snacks, or dessert

  • Boiled Fruit Cake Recipe

    Boiled Fruit Cake Recipe

    Boiled Fruit Cake Recipe

    A classic boiled fruit cake that is rich, moist, and packed with delicious dried fruits. This easy recipe is perfect for tea time, festive gatherings, or as a homemade dessert.

    Ingredients

    • 2 cups mixed dried fruits (raisins, currants, sultanas, and chopped dates)
    • 1 cup water
    • 1 cup brown sugar (or regular sugar)
    • 150g butter or margarine
    • 1 teaspoon baking soda
    • 2 cups all-purpose flour
    • 1 teaspoon baking powder
    • 1 teaspoon mixed spice (or a combination of cinnamon and nutmeg)
    • ½ teaspoon salt
    • 2 large eggs
    • 1 teaspoon vanilla extract

    Instructions

    Step 1: Prepare the Fruit Mixture

    In a medium saucepan, combine the dried fruits, water, sugar, and butter. Bring the mixture to a gentle boil, then reduce the heat and simmer for 5–10 minutes, stirring occasionally.

    Step 2: Add the Baking Soda

    Remove the saucepan from the heat and stir in the baking soda. The mixture will foam slightly, which is completely normal. Allow it to cool for 10–15 minutes.

    Step 3: Mix the Dry Ingredients

    In a separate bowl, whisk together the flour, baking powder, mixed spice, and salt until well combined.

    Step 4: Add Eggs and Vanilla

    Once the fruit mixture has cooled to a warm temperature (not hot), beat in the eggs and vanilla extract until fully incorporated.

    Step 5: Combine the Batter

    Gradually add the dry ingredients to the fruit mixture and stir until a smooth batter forms. Avoid overmixing.

    Step 6: Bake the Cake

    Pour the batter into a greased or lined baking pan and spread it evenly.

    Bake in a preheated oven at 160–170°C (320–340°F) for 45–60 minutes, or until a toothpick inserted into the center comes out clean.

    Serving Suggestions

    Allow the cake to cool completely before slicing. Serve with a cup of tea or coffee, or enjoy it on its own as a delicious fruit-filled treat.

    Tips

    • For extra flavor, soak the dried fruits overnight in fruit juice or tea before cooking.
    • Store the cake in an airtight container for up to one week.
    • The flavor improves after a day or two, making it an excellent make-ahead dessert.
  • Lotus Biscoff Crunch Cake

    Lotus Biscoff Crunch Cake

    Lotus Biscoff Crunch Cake

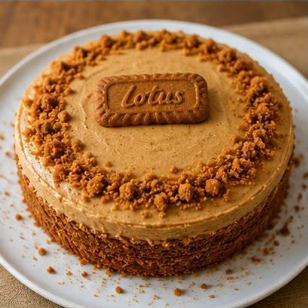
    A dreamy celebration cake packed with the irresistible caramelized flavor of Lotus Biscoff. This Lotus Biscoff Crunch Cake features soft Biscoff-infused sponge layers, silky Biscoff buttercream, and a crunchy cookie filling that adds the perfect texture to every bite.

    Perfect for birthdays, holidays, special occasions, or anyone who loves the rich flavor of Biscoff cookies.

    Why You’ll Love This Cake

    • Soft and buttery Biscoff-flavored cake layers
    • Creamy, smooth Biscoff buttercream
    • Crunchy Lotus biscuit filling for extra texture
    • Beautiful bakery-style decoration
    • A must-try dessert for cookie butter lovers

    Ingredients

    Lotus Biscoff Cake Layers

    • 2½ cups (315g) all-purpose flour
    • 2 tsp baking powder
    • ½ tsp baking soda
    • ½ tsp salt
    • 1 cup (227g) unsalted butter, softened
    • 1½ cups (300g) granulated sugar
    • 4 large eggs
    • 1 tsp vanilla extract
    • ¾ cup (180ml) whole milk
    • ½ cup (150g) Lotus Biscoff spread
    • ½ cup (70g) crushed Lotus Biscoff biscuits

    Biscoff Buttercream Frosting

    • 1 cup (227g) unsalted butter, softened
    • 4 cups (500g) icing sugar
    • ½ cup (150g) Lotus Biscoff spread
    • 2–3 tbsp heavy cream or milk
    • 1 tsp vanilla extract
    • Pinch of salt

    Crunchy Biscoff Filling

    • 1½ cups (200g) crushed Lotus Biscoff biscuits
    • ½ cup (150g) Lotus Biscoff spread, slightly melted

    Decoration

    • Whole Lotus Biscoff biscuits
    • Crushed Biscoff biscuits
    • Biscoff cookie crumbs
    • Melted Biscoff spread for drizzling (optional)

    Instructions

    1. Prepare the Biscoff Cake

    Preheat the oven to 175°C (350°F). Grease and line two 8-inch round cake pans with parchment paper.

    In a medium bowl, whisk together the flour, baking powder, baking soda, and salt. Set aside.

    In a large mixing bowl, beat the softened butter and sugar for 4–5 minutes until light, pale, and fluffy.

    Add the eggs one at a time, mixing well after each addition.

    Mix in the vanilla extract and Lotus Biscoff spread until fully combined.

    Gradually add the dry ingredients alternately with the milk, beginning and ending with the flour mixture. Mix gently until the batter is smooth.

    Fold in the crushed Biscoff biscuits for extra cookie flavor and texture.

    Divide the batter evenly between the prepared cake pans.

    Bake for 30–35 minutes, or until a toothpick inserted into the center comes out clean.

    Allow the cakes to cool completely before decorating.

    2. Make the Biscoff Buttercream

    Beat the softened butter until creamy and smooth.

    Gradually add the icing sugar, mixing on low speed until incorporated.

    Add the Biscoff spread, vanilla extract, salt, and heavy cream or milk.

    Beat for 3–5 minutes until the frosting becomes light, fluffy, and spreadable.

    3. Prepare the Crunch Filling

    Combine the crushed Biscoff biscuits with the melted Biscoff spread.

    Mix until the cookie crumbs are evenly coated and form a delicious crunchy filling.

    Allow the mixture to cool slightly before assembling the cake.

    4. Assemble the Cake

    Place one cake layer on a cake board or serving plate.

    Spread an even layer of Biscoff buttercream over the top.

    Sprinkle the Biscoff crunch filling evenly across the frosting.

    Add a thin layer of buttercream over the crunch filling to secure the next layer.

    Place the second cake layer on top.

    Apply a thin crumb coat around the entire cake and chill for 20 minutes.

    Cover the cake with the remaining Biscoff buttercream and smooth the sides.

    5. Decorate the Cake

    Finish the cake with:

    • Crushed Biscoff biscuits pressed around the sides
    • Buttercream swirls on top
    • A drizzle of melted Biscoff spread
    • Whole Lotus Biscoff biscuits for decoration
    • Extra cookie crumbs for a crunchy finish

    Chill briefly before slicing and serving.

    Expert Tips

    For the Best Biscoff Flavor

    Warm the Biscoff spread slightly before mixing into the batter and frosting for a smoother texture and stronger cookie flavor.

    For a Professional Finish

    Chill the cake after applying the crumb coat to create a cleaner, smoother final layer of frosting.

    For Extra Crunch

    Add the Biscoff crunch filling just before serving if you prefer a stronger cookie texture.

    Recipe Details

    • Prep Time: 30 minutes
    • Bake Time: 30–35 minutes
    • Cooling & Decorating Time: 1½ hours
    • Total Time: Approximately 2 hours 30 minutes
    • Servings: 12–14 slices

    Storage

    Store the cake in an airtight container in the refrigerator for up to 5 days. Allow it to sit at room temperature for 20–30 minutes before serving for the best texture and flavor.

    Final Thoughts

    This Lotus Biscoff Crunch Cake is the ultimate treat for cookie butter fans. With layers of soft sponge, creamy frosting, and a crunchy Biscoff center, every slice delivers the perfect combination of sweetness, spice, and caramelized cookie goodness.

  • Black Velvet Cake

    Black Velvet Cake

    Black Velvet Cake

    Deep, dark, and irresistibly decadent, this Black Velvet Cake is a stunning showstopper featuring ultra-moist chocolate cake layers paired with your choice of luscious fillings. Whether layered with silky salted caramel, rich chocolate ganache, fluffy whipped cream, or a combination of all three, this elegant dessert delivers a luxurious balance of flavor and texture in every bite.

    Perfect for birthdays, celebrations, dinner parties, or special occasions, this dramatic cake is guaranteed to impress.

    Why You’ll Love This Recipe

    • Exceptionally moist and tender crumb
    • Rich chocolate flavor with a striking dark appearance
    • Versatile filling options to suit any occasion
    • Beautiful multi-layer presentation
    • Bakery-style dessert that’s surprisingly easy to make

    Ingredients

    For the Black Velvet Cake

    • 2 cups all-purpose flour
    • 2 cups granulated sugar
    • ¾ cup Dutch-processed cocoa powder (or black cocoa powder for an even darker color)
    • 2 tsp baking powder
    • 1½ tsp baking soda
    • 1 tsp salt
    • 1 cup buttermilk, room temperature
    • ½ cup vegetable oil
    • 2 large eggs, room temperature
    • 2 tsp vanilla extract
    • 1 cup hot coffee or hot water

    Filling Options

    Salted Caramel Filling

    • 1 cup granulated sugar
    • 6 tbsp unsalted butter
    • ½ cup heavy cream
    • Pinch of salt

    Chocolate Ganache

    • 1 cup heavy cream
    • 8 oz (225 g) dark chocolate, finely chopped

    Stabilized Whipped Cream

    • 2 cups heavy cream
    • ½ cup powdered sugar
    • 1 tsp vanilla extract
    • 1 tbsp instant vanilla pudding mix (optional)

    Optional Decorations

    • Chocolate shavings
    • Chocolate curls
    • Finely grated chocolate
    • Orange zest curls
    • Cocoa powder dusting

    Instructions

    1. Prepare the Cake Layers

    Preheat the oven to 175°C (350°F).

    Grease and line five 6-inch cake pans with parchment paper. Alternatively, bake in larger pans and carefully slice the cakes into five even layers once cooled.

    In a large mixing bowl, whisk together the flour, sugar, cocoa powder, baking powder, baking soda, and salt.

    In a separate bowl, whisk together the buttermilk, vegetable oil, eggs, and vanilla extract until smooth.

    Gradually add the wet ingredients to the dry ingredients and mix until just combined.

    Slowly pour in the hot coffee or hot water and stir gently until incorporated. The batter will be thin, which helps create a moist and tender cake.

    Divide the batter evenly among the prepared pans.

    Bake for 20–25 minutes for 6-inch layers, or until the centers spring back lightly when touched and a toothpick inserted into the center comes out clean.

    Allow the cakes to cool in their pans for 10 minutes before transferring them to a wire rack to cool completely.

    2. Prepare Your Filling

    Salted Caramel Filling

    Place the sugar in a heavy-bottomed saucepan over medium heat.

    Allow it to melt, stirring occasionally, until it turns a deep amber color.

    Carefully add the butter and stir until fully melted.

    Slowly pour in the heavy cream while stirring continuously.

    Add a pinch of salt and continue stirring until smooth.

    Allow the caramel to cool before using.

    Chocolate Ganache

    Place the chopped chocolate in a heatproof bowl.

    Heat the cream until steaming but not boiling.

    Pour the hot cream over the chocolate and let sit for 2 minutes.

    Stir until smooth, glossy, and silky.

    Allow the ganache to cool slightly before assembling.

    Stabilized Whipped Cream

    Beat the heavy cream, powdered sugar, vanilla extract, and pudding mix until stiff peaks form.

    Refrigerate until ready to use.

    3. Assemble the Cake

    Place the first cake layer on a serving board or cake stand.

    Spread an even layer of your chosen filling over the surface.

    Repeat with the remaining layers, alternating fillings if desired for extra flavor and texture.

    Once all five layers are stacked, chill the cake for 15–20 minutes to stabilize the structure.

    4. Frost and Finish

    Cover the entire cake with chocolate ganache, chocolate buttercream, or whipped cream.

    Smooth the sides and top using an offset spatula or cake scraper.

    Return the cake to the refrigerator briefly to set the outer coating.

    Decorate with chocolate curls, chocolate shavings, grated chocolate, or delicate orange zest curls for a sophisticated finish.

    Expert Tips

    For an Ultra-Black Appearance

    Use black cocoa powder instead of regular Dutch-processed cocoa for a dramatic dark color and classic black velvet appearance.

    For Extra Moisture

    Replace half of the hot water with freshly brewed coffee to intensify the chocolate flavor.

    For a Luxury Bakery Finish

    Use alternating layers of salted caramel and chocolate ganache for a rich, multi-dimensional flavor profile.

    For Clean Slices

    Chill the assembled cake for at least 30 minutes before slicing.

    Recipe Details

    • Prep Time: 40 minutes
    • Bake Time: 20–25 minutes
    • Cooling Time: 1 hour
    • Assembly Time: 30 minutes
    • Total Time: Approximately 2 hours 30 minutes
    • Servings: 12–16 slices

    Storage

    Store covered in the refrigerator for up to 5 days. Bring to room temperature for 20–30 minutes before serving for the best flavor and texture.

    Final Thoughts

    With its striking dark layers, velvety crumb, and rich fillings, this Black Velvet Cake is the ultimate dessert for chocolate lovers. Elegant enough for special occasions and indulgent enough for any celebration, it’s a cake that looks spectacular and tastes even better.